FFXIV Chocobo Guide | Unlocking Battle Companion & Mount

MIN & BTN Leveling Guides updated. Other notes...

Botanist Leveling to 90, as well as Miner Leveling to 90 are updated for the Endwalker tier. Older tiers needs some fixing, although I modernized what I could quickly – I placed the important notes on the top of the aforementioned guides reflecting the major things that you need to take note of.

I will post a personal update soon, for those that are curious…

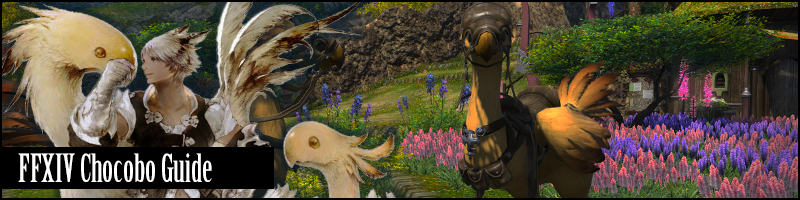
Well, you’re playing a Final Fantasy game – you’re bound to get a Chocobo some time, right? Well, if you’re here – then you’re well on your way to a feathered friend. In our FFXIV Chocobo Guide, you’ll learn a few things about them, primarily How to Unlock and get your Chocobo (Mount), and how to get your Battle Chocobo Companion.

FFXIV Chocobo Guide – Navigation
Initial unlock & Mount | Battle Chocobo

How to Unlock Chocobo Mount

It all starts here! This quest starts pretty much everything chocobo-centric.

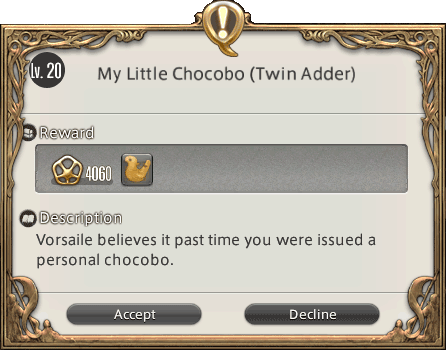
The quest is “My Little Chocobo”, location depends on which Grand Company you’re in. It’s always in your GC Headquarters!

FFXIV-ARR-Chocobo-Quest-My-Little-Chocobo

So that’s Limsa for Maelstrom, Gridania for Twin Adder, and Ul’dah for Immortal Flames.

My Little Chocobo Requirements:

  • You must be at least Level 20.
  • You must be part of a Grand Company. 
  • You should have completed the Level 20 story quest ‘Hero in the Making‘. (Pretty irrelevant, as this quest is what gives you the right to join a GC)

Completing “My Little Chocobo” Quest

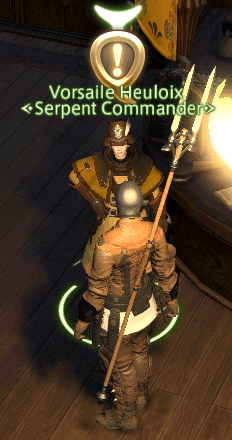
After pledging allegiance to your chosen Grand Company, speak to your Grand Company Commander to get the quest

FFXIV-ARR-Serpent-Commander

Nowadays, you only need 200 company seals to purchase a Chocobo Issuance. 

How to farm GC Seals?

FFXIV-ARR-Company-Leves

The quickest way to earn seals is Grand Company Leves, it takes only a few to earn 1,000 seals, if you maximize the bonuses. Company Leve locations (near this level) are as follows:

  • Moraby Drydocks in Lower La Noscea for The Maelstrom
  • Hawthorne Hut in the East Shroud for The Order of the Twin Adder
  • Camp Drybone in Eastern Thanalan for  The Immortal Flames

FATES are a great way to farm seals and EXP! Never pass up on a FATE!

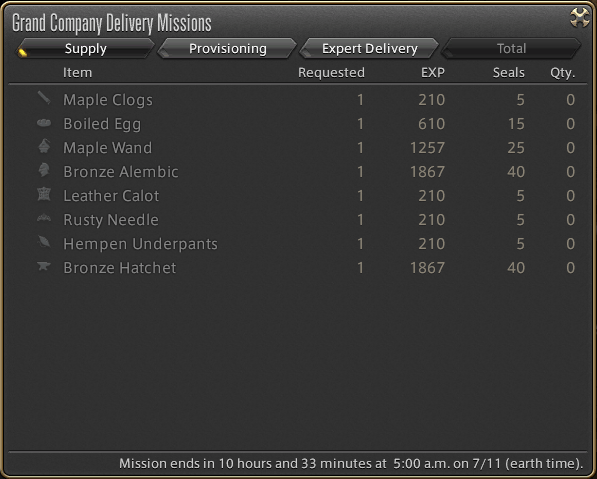
If you have started crafting, you can also submit crafted items to earn seals through Delivery Missions.

FFXIV-ARR-Grand-Company-Delivery-Missions

To see how many seals you have, click on your currency indicator and it will show your Seals.

After you get 200 seals, purchase a Chocobo Issuance from your Grand Company Quartermaster.

FFXIV-ARR-Grand-Company-Seal-Exchange

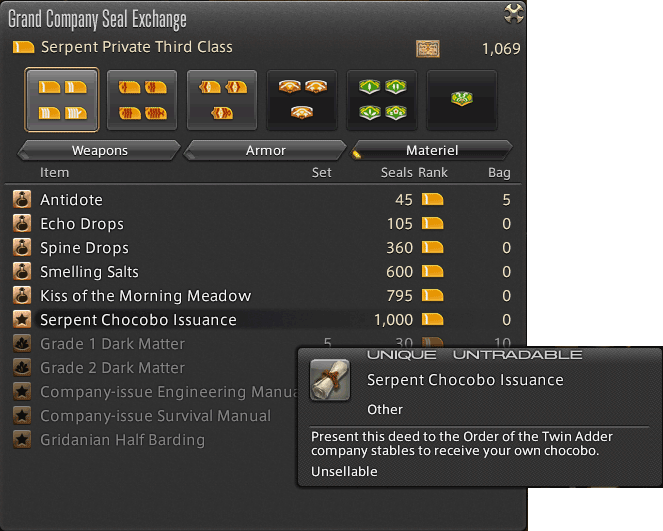
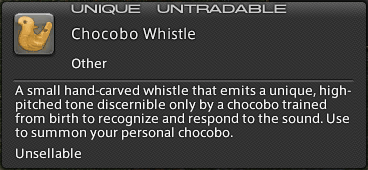
Present the Chocobo Issuance to the stablemaster at the Chocobo Stable located in the city of your allegiance and receive a Chocobo Whistle.

FFXIV-ARR-Cingur-Chocobo-NPC

FFXIV-ARR-Chocobo-Whistle

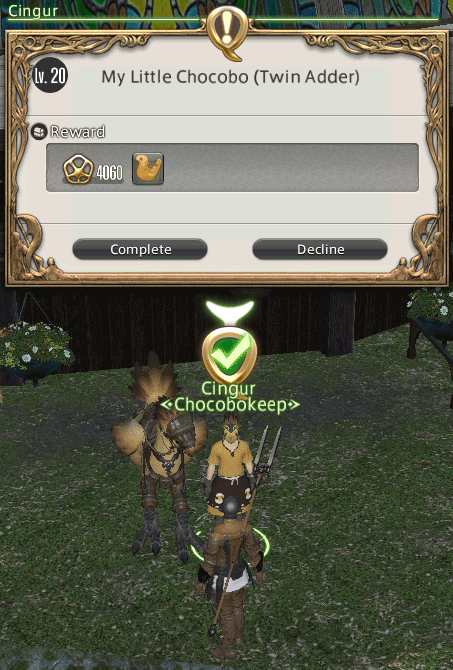
Name your new Chocobo, and there you have it!

FFXIV-ARR-Name-your-chocobo

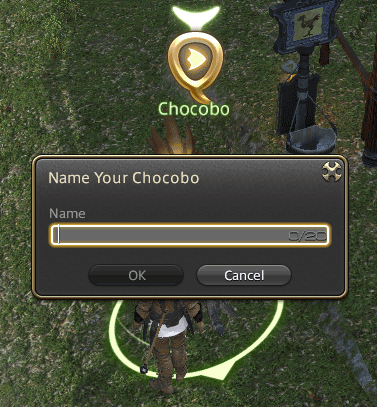
Congratulations! You’re now the proud owner of your very own Chocobo!

The Chocobo mount is likely one of the first mounts most players get. You can access this mount, and others, from the Character > Mount Guide menu, where you can place your mount into your hotbar for easy access.

Customize your Chocobo’s look via the barding system!
Character > Compation > Appearance tab.


How to unlock battle Chocobo?

While mounting your Chocobo is one thing – fighting alongside your plumed buddy is certainly another! Not all new players know about this, but it’s here! Formally, the “Battle Chocobo” system is called the “Companion” system.

The quest to unlock the companion system is called
“My Feisty Little Chocobo”, located at
Gridania, South Shroud – Camp Tranquil (17,28).

My Feisty Little Chocobo Requirements

  • You must be at least Level 30.
  • You must have completed “My Little Chocobo” (For the chocobo mount)

Quest Completion notes

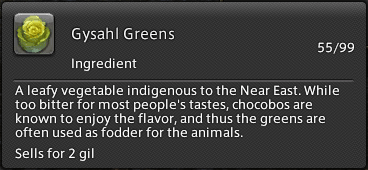
Where do you buy Gysahl Greens? To complete the quest AND use your Chocobo in battle, you’re gonna need to use these. Here’s a basic example of where to buy ’em.

  • Gridania: Maisenta – Vendor NW of Aetheryte Plaza
  • Limsa Lomania: Bango Zango – Only vendor in Aetheryte Plaza
  • Ul’dah: Roarich – Vender SE of Aetheryte Plaza, Ruby Road Exchange

Basically, these “basic vendor NPCs” sell them, and pretty much every major questing hub in the future.

FFXIV-ARR-Gysahl-Greens


Combat Chocobo Companion FAQ

How to summon your chocobo, or how to fight with a Chocobo?

  • use a Gysahl Green to summon your chocobo. These are in your inventory, and can be placed on a hotkey.
  • You can order your Chocobo to take on different roles in the party (Free, Attacker, Defender, and Healer Stances), using special commands that you can access  in the Actions & Traits screen, click on Companions.
  • Combat chocobos last a set period of time per Gyashl Green consumed, until felled in battle, or withdrawn.

Back in the day, Chocobo companions had a lot of BS surrounding it. You can’t queue up and they take up a party space! Plus other little annoyances that thankfully they patched out!


Can a Chocobo gain EXP and skills? What’s the best way to level them up?

Yes they gain EXP and skills. Discussion about these is found below. Best EXP for chocobos? Honestly, I can list down all the ways, in terms of “value”, in my perspective.

  • Weekly Challenge Logs – the two “Bosom Buddy” entries are the single best way to get EXP for your battle chocobo hands down.
  • Daily Training – I’m super lazy to do this, but any FC with a chocobo stable can make use of this feature. I think you gain 1% of your level with this? Care to chime in? it’s been a while since I did this.
  • Killing mobs – Please don’t do this purely for leveling your chocobo. Just remember to keep him summoned while you’re in the outside world (doing FATE’s etc). Again, if you grind solely for the purpose of Chocobo EXP, that’s insane. Its SUPER SLOW.

Combat Chocobo FAQ: Best Skills?

Well, this question was bound to come up. Chocobo skills are hard to come by as the game progresses, as they level up super slowly. This makes Chocobo SP (Skill Points, presumably) pretty valuable. If I was to give you a ROUGH GUIDELINE:

Healer  (up to a point) > DPS (up to a point) > Tank (up to a point)

Why this priority? Healer is useful to almost every class, Tanks and DPS moreso. The times they are useful are SUPER NOTICEABLE. Allowing you to possibly solo content you previously could not have.

DPS is of course, “basic as it gets” since any extra DPS is welcome. However, this doesn’t come close to the potential upside of a healer chocobo. A tiny fraction faster with DPS chocobo is a lot worse than “making something previously impossible, possible” which is the ceiling for a healer chocobo.

Primarily invest in Healer and DPS Chocobo skills nodes!

Tank is almost utterly useless in its current state. It’s a junk version of DPS. I only traverse this tree for the stats. Try it out if you don’t believe me. Or maybe try it out for research sake. Every time I’ve gone back and did it – the tank tree sucked badly. Basically, they can’t take / hold aggro for the life of ’em!

I can place my own personalized skill order here in the future, but honestly… is it even needed…

Chocobo Flying Quest? (Discontinued)

Back in the day you needed a quest to unlock flight functionality on your GC issued chocobo. Now, I don’t think this is the case.

The quest was removed from the game and I’m pretty sure they give the GC chocobo flight by the time you’re allowed to fly on any mount at the map you’re in.

Typically, this unlocks for A Realm Reborn tier content at L50 MSQ, and for each expansion and map afterward after attuning to their respective “Aether Current” system.

Summary & Closing

Well that’s about it regarding Chocobos in FFXIV. Good luck leveling ’em up, coloring ’em up, and dressing ’em up! If you think we should be adding or correcting something on here, feel free to let us know!


Join our IRL Cross-World Linkshells (socials lol): 

Contact us about anything and everything. Don't be shy! Love our guides and want to let us know? Got questions or corrections? Suggestions for improvement? TALK TO US! How, you say?

Comment below if it's about this guide. Message us on any of our socials above about anything.  We're organizing our email situation if you're into that.

FFXIV Pugilist (PGL) Basics Guide & FAQ – Shadowbringers Updated!

MIN & BTN Leveling Guides updated. Other notes...

Botanist Leveling to 90, as well as Miner Leveling to 90 are updated for the Endwalker tier. Older tiers needs some fixing, although I modernized what I could quickly – I placed the important notes on the top of the aforementioned guides reflecting the major things that you need to take note of.

I will post a personal update soon, for those that are curious…

Pondering on Pugilist? Pray you peruse our prose in our FFXIV Pugilist Basics Guide & FAQ. As implied, this is for players wanting to know the absolute basics, and answer some of the most common questions regarding PGL.

Likely, one of the main reasons you’re here is either unlocking Pugilist, or wondering about the eventual advanced jobs you can evolve into, Monk.

How to become a Pugilist? Unlocking PGL:

Primarily, you can begin your journey into Eorzea and start the game as a Pugilist – simply choose it as your starting option upon character creation.

If you didn’t start as a PGL, you can unlock the Pugilist class by going to the Pugilist Guild in Ul’dah – Steps of Nald (around 9,10), look out for the quests either “Way of the Pugilist”, or “So you want to be a Pugilist”.

Other unlocking prerequisites? I’m 99% sure you need to complete the Level 10 class quest of your STARTING CLASS if you want to unlock any other new ones.

Why should I play or choose Pugilist?

This question is semi irrelevant as, along with any of the other base classes, the only reason you’re a Pugilist is simply a stepping stone into Monk. But, I’ll give you a little description of what to expect anyway.

Monks are your mobile, hectic, “martial artist” melee DPS job. They’re a fair bit demanding on positional requirements, and have an extremely fast GCD – which may or may not be to your liking. Beating people up with fist weapons is an MMO aesthetic many get knocked out for, so if you’re hyped about Monk, you gotta first get your Pugilist stronk.

You’ll do well to learn a little more about what you’ll eventually BECOME:
FFXIV Monk Basics Guide.

Pugilist Crafters and Gatherers?

I often get asked “What Disciple of Hand or Disciple of Land classes go well with PGL?” Another related question to this is “Should I level them with my Pugilist simultaneously”? 

Leveling up your DoH and DoL classes should be thought of as a separate goal all on its own. I suggest leveling up DoH classes all together, and all DoL classes together (except the optional Fishing). Do not try to align your combat class levels to your non-combat levels. Trust me.

My only advice related to this is to never cap your levequests. If you’re at max leve allowances, feel free to spend them on Fieldcraft, Tradecraft, or Battlecraft leves just to uncap ‘em.

What’s the best race for Pugilist?

TLDR: I don’t know a single person who changes race for their main class for stats. The gain is not even .1% from worst to best. My advice? Choose for aesthetics.

If you REALLY wanna do it, check out our FFXIV Racial Stats Guide, which, FAIR WARNING – I am about to recheck and update next week. But honestly, it’s best you don’t even click on that – THE MICROSCOPIC INCREASE IN STATS IS NEAR IRRELEVANT.

Related Pugilist Guides – Read More!

Here are a few useful links for you:

Upcoming Odds and Ends

Here’s a few things we’ll be adding on here in the near future:

  • A small skill list for “human readability”, as the in-game one seems like the best source for EXACT information.
  • List of relevant links for this for Pugilist, and some links for Monk.

Feel free to suggest anything else via comment or socials!

Summary & In Closing

Well that’s it for our Pugilist Basics Guide & FAQ. There’s not much to say but these are really basic little guides to help out the budding or confused PGL, and hopefully future MNK! Hopefully we answered a few of your questions.


Join our IRL Cross-World Linkshells (socials lol): 

Contact us about anything and everything. Don't be shy! Love our guides and want to let us know? Got questions or corrections? Suggestions for improvement? TALK TO US! How, you say?

Comment below if it's about this guide. Message us on any of our socials above about anything.  We're organizing our email situation if you're into that.

FFXIV Conjurer (CNJ) Basics Guide & FAQ – Shadowbringers Updated!

MIN & BTN Leveling Guides updated. Other notes...

Botanist Leveling to 90, as well as Miner Leveling to 90 are updated for the Endwalker tier. Older tiers needs some fixing, although I modernized what I could quickly – I placed the important notes on the top of the aforementioned guides reflecting the major things that you need to take note of.

I will post a personal update soon, for those that are curious…

Curious about Conjurers? Come and correct your course with the help of our FFXIV Conjurer Basics Guide & FAQ. As implied, this is for players wanting to know the absolute basics, and answer some of the most common questions regarding CNJ.

Likely, one of the main reasons you’re here is either unlocking Conjurer, or wondering about the eventual advanced job you can evolve into, White Mage.

How to become a Conjurer? Unlocking CNJ:

Primarily, you can begin your journey into Eorzea and start the game as a Conjurer – simply choose it as your starting option upon character creation.

If you didn’t start as a CNJ, you can unlock the Conjurer class by going to the Conjurer’s Guild in Gridania – Old Gridania (around 7,11), look out for the quests either “Way of the Conjurer”, or “So you want to be a Conjurer”.

Other unlocking prerequisites? I’m 99% sure you need to complete the Level 10 class quest of your STARTING CLASS if you want to unlock any other new ones.

Why should I play or choose Conjurer?

This question is semi irrelevant as, along with any of the other base classes, the only reason you’re a Conjurer is simply a stepping stone into White Mage. But, I’ll give you a little description of what to expect anyway.

White Mages are your simple but relatable “Healer / Cleric” class. Known pound for pound as having the heaviest heals. They’ve a very “Holy / Good / Nature” kind of vibe. Fans of the general Final Fantasy franchise will recognize the red triangle robe! So if you can’t wait for White Mage healin’ you better get into the leveling Conjurer feelin’.

You’ll do well to learn a little more about what you’ll eventually BECOME:
FFXIV White Mage Basics Guide.

Conjurer Crafters and Gatherers?

I often get asked “What Disciple of Hand or Disciple of Land classes go well with CNJ?” Another related question to this is “Should I level them with my Conjurer simultaneously”? 

Leveling up your DoH and DoL classes should be thought of as a separate goal all on its own. I suggest leveling up DoH classes all together, and all DoL classes together (except the optional Fishing). Do not try to align your combat class levels to your non-combat levels. Trust me.

My only advice related to this is to never cap your levequests. If you’re at max leve allowances, feel free to spend them on Fieldcraft, Tradecraft, or Battlecraft leves just to uncap ‘em.

What’s the best race for Conjurer?

TLDR: I don’t know a single person who changes race for their main class for stats. The gain is not even .1% from worst to best. My advice? Choose for aesthetics.

If you REALLY wanna do it, check out our FFXIV Racial Stats Guide, which, FAIR WARNING – I am about to recheck and update next week. But honestly, it’s best you don’t even click on that – THE MICROSCOPIC INCREASE IN STATS IS NEAR IRRELEVANT.

Related Conjurer Guides – Read More!

Here are a few useful links for you:

Upcoming Odds and Ends

Here’s a few things we’ll be adding on here in the near future:

  • A small skill list for “human readability”, as the in-game one seems like the best source for EXACT information.
  • List of relevant links for this for Conjurer, and some links for White Mage.

Feel free to suggest anything else via comment or socials!

Summary & In Closing

Well that’s it for our Conjurer Basics Guide & FAQ. There’s not much to say but these are really basic little guides to help out the budding or confused CNJ, and hopefully future WHM! Hopefully we answered a few of your questions.


Join our IRL Cross-World Linkshells (socials lol): 

Contact us about anything and everything. Don't be shy! Love our guides and want to let us know? Got questions or corrections? Suggestions for improvement? TALK TO US! How, you say?

Comment below if it's about this guide. Message us on any of our socials above about anything.  We're organizing our email situation if you're into that.

FFXIV Thaumaturge (THM) Basics Guide & FAQ – Shadowbringers Updated!

MIN & BTN Leveling Guides updated. Other notes...

Botanist Leveling to 90, as well as Miner Leveling to 90 are updated for the Endwalker tier. Older tiers needs some fixing, although I modernized what I could quickly – I placed the important notes on the top of the aforementioned guides reflecting the major things that you need to take note of.

I will post a personal update soon, for those that are curious…

Trying out Thaumaturge? Thank the twelve you’ve tread into our FFXIV Thaumaturge Basics Guide & FAQ. As implied, this is for players wanting to know the absolute basics, and answer some of the most common questions regarding THM.

Likely, one of the main reasons you’re here is either unlocking Thaumaturge, or wondering about the eventual advanced job you can evolve into, Black Mage.

How to become a Thaumaturge? Unlocking THM:

Primarily, you can begin your journey into Eorzea and start the game as a Thaumaturge – simply choose it as your starting option upon character creation.

If you didn’t start as a THM, you can unlock the Thaumaturge class by going to the Thaumaturge Guild in Ul’dah – Steps of Nald (around 7,12), look out for the quests either “Way of the Thaumaturge”, or “So you want to be a Thaumaturge”.

Other unlocking prerequisites? I’m 99% sure you need to complete the Level 10 class quest of your STARTING CLASS if you want to unlock any other new ones.

Why should I play or choose Thaumaturge?

This question is semi irrelevant as, along with any of the other base classes, the only reason you’re a Thaumaturge is simply a stepping stone into Black Mage. But, I’ll give you a little description of what to expect anyway.

If you ever wanted to stay still, tunnel, and blame your teams’ strategy for why you died then Black Mage is for you! Seriously though, they’re the least mobile DPS class, with the tightest cast bar and timing requirements. Some say refining your Black Mage is an artform, level up your Thaumaturge as a start for!

You’ll do well to learn a little more about what you’ll eventually BECOME:
FFXIV Black Mage Basics Guide.

Thaumaturge Crafters and Gatherers?

I often get asked “What Disciple of Hand or Disciple of Land classes go well with THM?” Another related question to this is “Should I level them with my Thaumaturge simultaneously”? 

Leveling up your DoH and DoL classes should be thought of as a separate goal all on its own. I suggest leveling up DoH classes all together, and all DoL classes together (except the optional Fishing). Do not try to align your combat class levels to your non-combat levels. Trust me.

My only advice related to this is to never cap your levequests. If you’re at max leve allowances, feel free to spend them on Fieldcraft, Tradecraft, or Battlecraft leves just to uncap ‘em.

What’s the best race for Thaumaturge?

TLDR: I don’t know a single person who changes race for their main class for stats. The gain is not even .1% from worst to best. My advice? Choose for aesthetics.

If you REALLY wanna do it, check out our FFXIV Racial Stats Guide, which, FAIR WARNING – I am about to recheck and update next week. But honestly, it’s best you don’t even click on that – THE MICROSCOPIC INCREASE IN STATS IS NEAR IRRELEVANT.

Related Thaumaturge Guides – Read More!

Here’s a few useful links for you

Upcoming Odds and Ends

Here’s a few things we’ll be adding on here in the near future:

  • A small skill list for “human readability”, as the in-game one seems like the best source for EXACT information.
  • List of relevant links for Thaumaturge, some links for Black Mage.

Feel free to suggest anything else via comment or socials!

Summary & In Closing

Well that’s it for our Thaumaturge Basics Guide & FAQ. There’s not much to say but these are really basic little guides to help out the budding or confused THM, and hopefully future BLM! Hopefully we answered a few of your questions.


Join our IRL Cross-World Linkshells (socials lol): 

Contact us about anything and everything. Don't be shy! Love our guides and want to let us know? Got questions or corrections? Suggestions for improvement? TALK TO US! How, you say?

Comment below if it's about this guide. Message us on any of our socials above about anything.  We're organizing our email situation if you're into that.

FFXIV ARR Titan Hard Mode

Getting tired of Titan? Are you stuck in Titan Hard Mode? Keep your hopes up and let us guide you through one of the most fulfilling fights in FFXIV ARR.


From deep within their mines, the kobolds have watched and waited for another opportunity to summon their Great Father and wreak havoc on Limsa Lominsa. With the destruction of Ultima Weapon, the final obstacle to their plans was removed, allowing the beastmen to summon their god without fear of imperial reprisal. Once more, it falls to you to ensure that the Lord of Crags never sees the light of day.

The first LEGIT Gear check in the game, and if you have lag issues, get ready to die in this fight! We had fun learning how to play Titan and beat him. We will show you two videos below, one is our first defeat of Titan and the second is where we helped a few of our FC members get past him.

Our very first Titan HM Kill:

One important thing to note is, all non-tank players must ideally have more than 3,500 life to survive this fight (specially important in the last phase where he does 6-8 Tumults straight). Lag and slow reaction time also play a major factor in beating Titan, you must be focused, know his rotation and position yourselves carefully in order to win.

Team Compositions:

  • PUG: 2 Tanks, 2 Healers, 4 DPS (The type of party you get from duty finder)
  • 3 Healers: 1 Tank, 3 Healers, 4 DPS (Safest run, best for lesser geared groups)
  • 5 DPS: 1 Tank, 2 Healers, 5 DPS (Ideal for more experienced groups)
  • Carry: 1 Tank, 2 Healers, 3-4 DPS, 1-2 Carry (when we want to get a guild member through)

Abilities

In hard mode, Titan has some a new rotation with new abilities also

  • Landslide (Pushback): Like in Titan Story mode, watch out for this frontal pushback ability, if you get hit chances are you will fall from the stage, and the moment one party member falls its practically a wipe.
  • Tumult (AoE): Back with a vengeance, in post heart phase, Titan can dish out 6-8 Tumults in succession.
  • Weight of the Land (Plumes): Another skill from Titan Story mode, this time with a vengeance. It’s important the team positions themselves so that when he casts this they can move away to a safe position.

FFXIV-ARR-Titan-Hard-Mode-Bomb-1 FFXIV-ARR-Titan-Hard-Mode-Bomb-2 FFXIV-ARR-Titan-Hard-Mode-Bomb-3

  • Bomb Boulders: A new mechanic, Titan calls down bombs that explode in a certain pattern, there are 3 types to watch out for but the rule of thumb is, the first bomb to light up is the first bomb to go
    • Type 1: Clockwise detonation, tanks will either take one bomb damage or hide between two bombs so they do not get hit (takes practice to hide believe me!)
    • Type 2: We call this the easy bombs, just find a safespot in either the N,S,W or E areas of the map
    • Type 3 (Post heart only) : This is where it gets tricky, 3 bombs get dropped parallel to each other. In this set the middle group of bombs always blow up first. So you want to stay where the last set will blow and immediately move to the middle once it blows up. (Titan usually casts Landslide right after these bombs show up, the moment he lets go of Landslide is when we move to the center)
  • Gaol: Much like the Story Mode mechanic, a random party member will get imprisoned and will be tagged with a determination down debuff (it’s important that the healers strip this debuff after the party member gets freed from the Gaol). Also, Titan sometimes casts Landslide on an imprisoned member of the team, make sure you wait till after he casts Landslide to free your team member.
  • Geocrush (Jump): Just like in Story Mode, Titan Jumps up and after each jump the stage gets smaller, key position here is to group up so that healers can cast their AoE heals before going back into position
  • Earthen Fury (Ultimate): Same mechanic in story mode, if you do not defeat his heart in enough time Earthen Fury will destroy you! This is a DPS check and you will need to your whatever limit break you have to kill the heart. We usually time this right after the last Weight of the Land in the heart phase.
  • Mountain Buster: Heavy hitting frontal cone attack (never stay near the tank in this phase or you will fall. Tanks need to time their mitigation for this skill if they are not topped up.


General Strategy for roles:

Tank: Positioning is important, mitigation should be timed. You want to position Titan as close to the edge as possible to give your party enough space behind to move around and dodge ‘Weight of the Land’. Positioning is also important during the ‘Bomb Boulder‘ phases. In our FC, it is the tanks job to memorize Titan’s rotation and call out ‘Weight of the Land‘ and ‘Mountain Buster

FFXIV-ARR-Titan-Hard-Mode-Bomb-Boulder-Type-1-Tank-Position

Healer: Healers are the key to this fight, if one falls you are in for a ride! Positioning is important for healers to make use of their AoE abilities, after each Geocrush, Healers need to pre-cast their heals so the party gets topped up and during the post heart phase the healers need to ensure they top-up the tank before ‘Mountain Buster’ and also pre-cast AoE heals before he does ‘Tumult

DPS: All the DPS need to be careful of is avoiding Landslide, Weight of the Land and getting to know positioning during the bomb phases. They must also be conscious of their position so that the healers can have a place to run to when weight of the land hits.

Titan Hardmode Infographic

FFXIV-ARR-Titan-Hardmode-Infographic-Visual-Guide

1st Phase (Pre-heart)

Skill rotation: Landslide, Tumult, GEOCRUSH (Jump), REPEAT > Weight of the Land, Landslide, Tumult, GEOCRUSH (Jump), REPEAT > Landslide, Weight of the Land, Bombs, Landslide, Weight of the Land, Gaol, Tumult, GEOCRUSH (Jump)

FFXIV-ARR-Titan-Hard-Mode-Pre-Heart

In the first phase we see Titan showcase some of his new abilities namely the Bomb Bomb rotations. This phase will test how well the group can dodge Landslide and Weight of the Land. You will also be able to get a feel for how much DPS your group can do. Remember to save DPS cooldowns for when he reaches the heart phase

2nd Phase (Heart) 50% life

Skill rotation: Gaol, Landslide, Weight of the Land, Tumult, Gaol, Landslide, Weight of the Land, EARTHEN FURY

One the heart pops out, pop all DPS cooldowns and make sure to free whoever is in a Gaol. Note that when he casts Gaol the second time, the party should ignore the Gaol and focus on defeating the heart. We suggest to use your limit break, whether level 1 or 2 right after he casts the last Landslide or Weight of the Land. Once the heart is defeated immediately focus your attention on the imprisoned party member, if they are not freed from the Gaol before he casts Earthen Fury, the party member will fall.

3rd Phase (Post-heart)

Skill rotation: Mountain Buster, Tumult, Weight of the Land, Bombs, Landslide, Gaol, Mountain Buster, Weight of the Land, Landslide

FFXIV-ARR-Titan-Hard-Mode-After-Heart

The scary phase here are the first 3, most specially for the healers who will need to ensure the tank is topped up just before Mountain Buster and immediately focus on healing the group in time for Tumult. Swiftcast for healers is an awesome and almost critical mitigating skill in this part of the fight.

The Bomb phase always takes first timers by surprise. The key to dodging the bombs in this phase is not to PANIC. in the Bombs Type 3, always remember that the middle bombs will explode first, simply find where the last exploding set of bombs are and stay in that area (dont be afraid to stand next to a bomb! you will need to move because he casts landslide) just remember to move to the center right after he lets go of landslide.

One more thing to note is that when he reaches about 25% life he increases the amount of Tumults he does from 6 to 8 times, this is where AoE healing and positioning is key.

Visual Notes on the Titan Hard Mode Fight

Dont Release your Party Members from the Gaol until after he casts landslide on them like so:

FFXIV-ARR-Titan-Hard-Mode-Gaol-Landslide

This is an example of Type 3 Bombs, in this case I move with the party to my left, and wait for Titan to cast landslide and then move to the middle

FFXIV-ARR-Titan-Hard-Mode-Bomb-Boulder-Type-3-Example

FFXIV-ARR-Titan-Hard-Mode-Bomb-Boulder-Type-3-Run

Sample Positioning for Weight of the Land

FFXIV-ARR-Titan-Hard-Mode-Weight-of-the-Land-Positioning

The three main reasons people die at Titan hard:

  1. Weight of the land: Your dps and healers should already look for where to run BEFORE weight of the land hits. Because of this, unnecessary movements should be avoided. If you know WHEN the next weight hits, and WHERE to run beforehand, you will dodge it 100% of the time, believe me.
  2. Type 3 Bombs: The triple line bomb formation is the reason most people die. To be honest, it’s largely because they panic. All non-tank players should simply move to the middle-bomb of the last set that spawned. Once titan punches the ground, move towards the center. Simple as that!
  3. Mountain Buster: Both the tank and the healers should be aware of when the next “table flip” occurs. Tanks can pop a cool-down, and healers can pre-cast shields and heals. Note that every random damage that happens to the raid makes it harder for healers to keep the tank up to 100%. As a DPS, you got one job: Avoid damage.

Finally, Good Luck in your fight with Titan!

FFXIV-ARR-Titan-Hard-Mode-Thanks

Follow us on Facebook for more FFXIV updates!

FFXIV ARR Cross Class Skill Guide

Read our Role Actions Guide
for an update version of cross class skills. 


So we’ve been getting a lot of request for listing a cross class table that is up to date. Here it is, we have also listed separate cross class tables per Job/Class which we will update in this page in the next few days.

Let us know if you have any feedback in the comments.

Few things to note:

  1. Hover over a skill name to see their entry in XIVDB (note that not all skills are up to date in XIVDB)
  2. All skill tooltips from XIVDB seem to be TRAITED. The actual skills useable as cross-class are UNTRAITED.
  3. All descriptions are up to date as of 12-Oct-2014.
Skill NameBRDWHMPLDWARMNKDRGBLMSCHSMN
Straight Shotx
Raging Strikesxxx
Venomous Bitex
Hawk's Eyexxx
Quelling Strikesxxx
Stonex
Curexx
Aeroxx
Cleric Stancexx
Protectxxx
Raisexxx
Stoneskinxxx
Savage Bladexx
Flashxx
Convalescencexx
Provokexx
Awarenessxx
Foresightxxxx
Skull Sunderxxxx
Fracturexxxx
Bloodbathxxxx
Mercy Strokexxxx
Featherfootxxxx
Second Windxxxx
Haymakerxxxx
Internal Releasexxxx
Mantraxxxx
Feintxxx
Keen Flurryxxx
Impulse Drivexx
Invigoratexxx
Blood for Bloodxxx
Thunderxxxx
Surecastxxxx
Swiftcastxxxx
Ruinxxxx
Bioxxxx
Physickxxxx
Virusxxxx
Eye for an Eyexxxx


We also have a discussion and recommendation guide for each class:

Bard Cross Class Skills Guide

Paladin Cross Class Skills Guide

Dragoon Cross Class Skills Guide

Warrior Cross Class Skills Guide

Monk Cross Class Skills Guide

Summoner Cross Class Skills Guide

Scholar Cross Class Skills Guide

White Mage Cross Class Skills Guide

Black Mage Cross Class Skills Guide

Follow us on Facebook for more FFXIV updates!

Allagan Tomestones (Philosophy & Mythology)


What are Allagan Tomestones?

Allagan Tomestones are an end-game currency you get from various duties (Dungeons/Trials) which you can use to buy end game equipment. There are two types of Allagan Tomestones (Philosophy and Mythology). The Allagan Tomestones of Philosophy are easier to obtain than the Mythology (see our list of where to get Tomestones below)

How many Allagan Tomestones can you carry? What is the cap for Allagan Tomestones?

These are questions that get asked a lot, the simple answer is you can can carry up to 2,000 of each, for Mythology though there is a 300 450 a week cap (changed in 2.1). To view this cap simply go to your Character menu and click on ‘Currency’. The Tomestones on top are the Philosophy, the ones on the bottom are Mythology

FFXIV-ARR-Allagan-Tomestone-Limit


Where can I use Allagan Tomestones? What can I buy from Allagan Tomestones?

In Mor Dhona (Revenants Toll) there is an NPC ‘Auriana’ near the Aetheryte. This is where you can spend your Allagan Tomestones, all the armor here is higher quality than that of the story quest. Also important to note that if you are doing your ‘A Relic Reborn’ quest, you will need to purchase a ‘Bottle of Radz-at-Han Quenching oil‘ for 900 Allagan Tomestones of Philosophy after defeating Titan Hard.

FFXIV-ARR-Allagan-Tomestone-NPC-Aurianca

Where do you get Allagan Tomestones of Philosophy / Mythology?

Here is what we have so far, if you know of any other sources, please note down in the comments!

PlaceTome of PhilosophyTome of Mythology
Duty RouletteLow level dungeons - 100
Main Scenario - 100
Low level dungeon - 10
High level dungeon - 40
Must be level 50 to receive tomestones
If you are not level 50 you receive GC currency instead
Award is only received once per day
DUNGEONS
Castrum Meridianum100-
The Praetorium100-
Amdapor Keep10030
The Wanders Palace10030
Copperbell Mines (Hard)10050
Haukke Manor (Hard)10050
Pharos Siruis10050
Crystal Tower20050
The Binding Coil of Bahamut-50 (Myth only drops for Turn 1,2,4,5)
PRIMALS
Ifrit (Hard)104
Garuda (Hard)157
Titan (Hard)2015
Ultima's Bane2017
King Moggle Mog1512
Garuda (Extreme)2519
Titan (Extreme)2522
Ifrit (Extreme)2525
OTHER
Beast Tribe Daily0,5,10,150,3
Timeworn Leather Map??
Timeworn Goatskin Map??
Timeworn Toadskin Map??
Timeworn Boarskin Map??
Timeworn Peisteskin Map??

What is Darklight Armor / Relic+1 Armor / End Game Armor?

Here is the known tier system for equipment right now:

  • Story Quest / Grand Company / Crafted gear
  • Darklight: buy using Allagan Tomestones of Philosophy
  • Primal Weapons (Hardmode) from Titan (item level 80) > Garuda (item level 70) > Ifrit (item level 60)
  • Relic Weapon: from quest chain ‘A Relic Reborn’
  • Relic+1: buy using Allagan Tomestones of Mythology
  • Allagan: drops from the Binding Coil of Bahamut
  • Allagan Weapon (i95): drops from turn 5 of the Binding Coil of Bahamut

FFXIV ARR Updated (Sep. 11) – Patchnotes

What? Speedruns nerfed!? – See what else happened in the 09-11-13 patch.


Patch-notes

Taken from: http://na.finalfantasyxiv.com/lodestone/news/detail/3f6afb396b105b2e8af4f9c785cbc560871376da

Key updates this patch are:

  1. Reduced equipment repair costs
  2. No more speed runs of Ampador Keep and The Wanderer’s Palace
  3. Auto-logout feature was introduced if a player goes inactive for 30minutes

[Date & Time]
Sep. 11, 2013 around 7:15 p.m. (PDT)

[Affected Service]
FINAL FANTASY XIV: A Realm Reborn

[Update Details]
The following features have been implemented:

An auto-logout feature has been introduced wherein characters that are inactive for 30 minutes will be automatically logged out of the game.

The following adjustments and countermeasures have been implemented:

  • Changes have been made to the behavior and mechanics of the enemies found within the “The Wanderer’s Palace” and “Amdapor Keep” dungeons to counteract instances of players running through the dungeon without engaging enemies on the way to bosses.
  • As advancing through dungeons without defeating enemies is not an intended strategy, we plan to continue making further changes in the future to discourage this type of behavior.
  • In instance dungeon “The Wanderer’s Palace” and “Amdapor Keep”, we have increased the amount of AllaganCoins that can be obtained from a treasure chest.
  • Reduced the amount of gil required for repair fees and materia removal as follows:
    • Equipment levels 1-10: 10 gil -> No Change
    • Equipment levels 11-20: 50 gil -> 30 gil
    • Equipment levels 21-30: 100 gil -> 60 gil
    • Equipment levels 31-40: 210 gil -> 120 gil
    • Equipment levels 41-40: 500 gil -> 200 gil
  • Reduced the price of Dark Matter as follows:
    • Dark Matter G1: 5 gil -> 4 gil
    • Dark Matter G2: 30 gil -> 12 gil
    • Dark Matter G3: 70 gil -> 24 gil
    • Dark Matter G4: 150 gil -> 48 gil
    • Dark Matter G5: 350 gil -> 80 gil

A temporary countermeasure has been implemented for the following issue:

  • For the issue wherein the “Manor Sentries” found within the Haukke Manor dungeon could become stuck and prevent players from progressing through the instanced dungeon, we have changed the original location of “Manor Sentries” to the second floor.

The following issues have been addressed:

  • The server would crash under certain conditions during instanced dungeons.
  • Characters would sometimes get stuck in the “Binding Coil of Bahamut” dungeon after the party was wiped out.
  • Bomb Boulders would sometimes fail to appear in “The Navel (Hard)” battle.
  • Certain monsters would sometimes get stuck in the “Amdapor Keep” dungeon.
  • The option to return to Home Point would not display when completing a primal battle while being KO’d.
  • The entry point for the “The Thousand Maws of Toto-Rak” dungeon was shown in the field in the “Stinging Back” guildhest.
  • The “Steel Reign” FATE would sometimes fail to appear.
  • Completing the “Behold Now Behemoth” FATE would sometimes cause the server to crash.
  • If the player was disconnected during the “Lady of the Vortex” instanced battle, the Duty List, Journal, and Journal Map may display incorrectly.
  • The “Notorious Biggs” quest could sometimes be progressed without completing the instanced battle.
  • There were occasions where it was impossible to target the snowman in the “Speak Softly to Me” quest.
  • The cutscene was canceled if the player was attacked during the “Lord of Crags” cutscene.
  • If a player logged out while being bound by duty within an instance, and logged back in after conclusion of the instance, the free company chat would not work.
  • Mog Letters were not sent properly in some instances.
  • Certain conditions would sometimes cause the server to crash while interacting with the free company “Company Chest”.
  • The “Reach” gauge was sometimes not selectable when in a new, unknown gathering point.
  • In some instances, the specified items to collect were incorrect in the “A Relic Reborn” quest.
  • In some instances, the specified enemies to defeat were incorrect in the “A Relic Reborn” quest.

FFXIV ARR A Relic Reborn Guide

Find out how to get your Jobs RELIC WEAPON.

**This page is still useful – but we have a more modern Consolidated Relic Guide,
which details ALL steps in your relic.**

What is A Relic Reborn? What are the Relic Weapons of each Job?

A Relic Reborn, is a series of quests that lead you to get your Job’s Relic Weapon (basically the weapon you see your Job wearing in the intro movie) this quest WILL test your patience and you cannot simply finish this quest without putting some hard work, strategy and a good group of friends to help you out – you’ll know what I mean when you start doing the quest! To get your appetite’s wet, below you will find a list of each Job’s Relic Weapon.

JobRelic Weapon (hover over link to view)
Black MageStardust Rod
BardArtemis Bow
DragoonGae Bolg
MonkSphairai
PaladinCurtana
Holy Shield
ScholarOmnilex
SummonerThe Veil of Wiyu
WarriorBravura
White MageThyrus

A Relic Reborn Walkthrough

Step 1: Complete Main Scenario Quest, All Class and Job quests for that respective weapon.

Step 2: Talk to ‘Nedrick Ironheart‘ in Vesper Bay who will give you the quest ‘A Relic Reborn

Step 3: Talk to ‘Rowena’ in Revenant’s Toll

Step 4: Talk to ‘Gerolt‘ in Hyrstmill (Northwest of Fallgourd Float – take a Chocobo Porter)

Step 5: Gerolt will ask you to find your respective ‘Broken Weapon‘ go to:

  • Natalan: BARDDRAGOON
  • Sapsa Spawning Grounds: SCHOLAR
  • Sylphlands: SUMMONER
  • U’Ghamaro Mines: BLACKMAGE, WARRIOR, WHITEMAGE
  • Zaha’rak: MONK, PALADIN

Step 6: Present Gerolt with your Job specific weapon double melded with Grade III Materia. (either buy these weapons from the Marketplace or look below to find out how to get these weapons)

  • BARD: Longarm’s Composite Bow + 2 Heaven’s Eye Materia III
  • BLACKMAGE: Sanguine Scepter + 2 Savage Might Materia III
  • DRAGOON: Champion’s Lance + 2 Savage Aim Materia III
  • MONK: Wilding Cesti + 2 Savage Aim Materia III
  • PALADIN: Aeolian Scimitar + 2 Battledance Materia III
  • SCHOLAR: Erudite’s Picatrix Of Healing + 2 Quicktongue Materia III
  • SUMMONER: Erudite’s Picatrix Of Casting + 2 Savage Might Materia III
  • WARRIOR: Barbarian’s Bardiche + 2 Battledance Materia III
  • WHITEMAGE: Madman’s Whispering Rod + 2 Quicktongue Materia III

NOTE: This step is where a lot of people are getting stuck, for one, Grade III materia for this quest costs an arm and a leg… and secondly not many people know how to meld materia. If you are patient, you can spirit bond level 48 and above armor and weapons and convert them into materia, if you are lucky you will get the type of materia you need for the quest, otherwise sell the materia to earn enough to buy form the marketplace. To meld materia into armore you need to find a Disciple of Hand who is level 50 to meld into your gear

[pic]

Step 7: Obtain ‘Alumina Salts‘ from fighting the D’horme Chimera in Coerthas (Northeast of Camp Dragonhead). You must defeat the Chimera as the Job you will get the relic weapon with. Once defeated bring the salts back to Gerolt.

Step 8: Obtain ‘Amdapor Glyph‘ from completing Amdapor Keep. You must complete Amdapor as the Job you will get the relic weapon with. Bring this to Rowena

Step 9: After going back to Gerolt, he will ask you to slay 24 beastmen with the ‘Unfinished Relic Weapon‘ he just gave you

  • BARD: 8x Natalan Boldwings, 8x Fogcallers, 8x Windtalons
  • BLACKMAGE: 8x U’Ghamaro Quarrymen, 8x Bedesmen, 8x Priests
  • DRAGOON: 8x Natalan Boldwings, 8x Fogcallers, 8x Swiftbeaks
  • MONK: 8x Zahar’ak Lancers, 8x Pugilists, 8x Archers
  • PALADIN: 8x Zahar’ak Lancers, 8x Pugilists, 8x Thaumaturges
  • SCHOLAR: 8x Sapsa Shelfspine, 8x Shelfclaw, 8x Shelftooth
  • SUMMONER: 8x Sylpheed Sighs, 8x Screeches, 8x Snarls
  • WARRIOR: 8x U’Ghamaro Quarrymen, 8x Roundmen, 8x Bedesmen/Priests
  • WHITEMAGE: 8x U’Ghamaro Quarrymen, 8x Bedesmen, 8x Preists

NOTE: Watch out for the quest markers on top of the enemies you need to defeat, some quests we know are bugged, where they say you have to kill a certain mob, but the quest icon on top of the monster does not show up. Kill the monsters with the quest icon on top of their heads instead.

Step 10: Slay the Hydra in Halatali. You must defeat the Hydra as the Job you are getting the relic weapon with.

Step 11: Defeat Ifrit (Hard) and obtain ‘White-Hot Ember‘. You must defeat Ifrit as the Job you are getting the relic weapon with.

Step 12: Defeat Garuda (Hard) and obtain ‘Howling Gale‘. You must defeat Garuda as the Job you are getting the relic weapon with.

Step 13: Defeat Titan (Hard) and obtain ‘Hyperfused Ore‘. You must defeat Titan as the Job you are getting the relic weapon with.

Step 14: Purchase ‘Bottle of Radz-at-Han Quenching oil‘ for 900 Allagan Tomestones of Philosophy from Rowena


How do I get the pre-requisite relic weapon to meld in Step 6?

Like we mentioned earlier, its easier to buy these items in the marketplace. But if you really want to, here are the recipes to craft them. Base Weapon Location’s are in Wanderer’s Palace, formulas are below.

Alchemist:

  • Madman’s Whispering Rod (WHM): 1x Growth Formula Delta, 1x, Thavnairian Mistletoe, 1x Vampire Plant
  • Erudite’s Picatrix Of Casting (SMN): 1x Enchanted Gold Ink, 1x Bloody Grimoire Binding
  • Erudite’s Picatrix Of Healing (SCH): 1x Enchanted Gold Ink, 1x Bloody Grimoire Binding

Blacksmith:

  • Aeolian Scimitar (PLD): 1x Darksteel Nugget, 1x Blunt Aeolian Scimitar, 1x Basilisk Whetstone
  • Barbarian’s Bardiche (WAR): Darksteel Nugget, 1x Bloody Bardiche Head, 1x Basilisk Whetstone

Carpenter:

  • Champion’s Lance (DRG): 1x Spruce Lumber, 1x Bloody Lance Head
  • Longarm’s Composite Bow (BRD):1x Spruce Lumber, 1x Bloody Bow Rim

Leatherworker:

  • Wildling’s Cesti (MNK): 1x Darksteel Nugget, 1x Bloody Cesti Covers

Goldsmith:

  • Sanguine Scepter(BLM): 1x Darksteel Nugget, 1x Pinprick Pebble

Base Ingredient Locations:

  • Darksteel Ore: Dragonhead (Coerthas) Mining – Rare Node – 1:00 am Eorzea Time
  • Gold Sand: Drybone (Eastern Thanalan) Quarrying – Rare Node – 5:00 am Eorzea Time
  • Spruce Log: Dragonhead (Coerthas) Logging – Rare Node – 10:00 am Eorzea Time
  • Thavnarian Mistletoe: Dragonhead (Coerthas) Logging – Rare Node – 5:00 pm Eorzea Time
  • Trillium Bulb: Hawthorne Hut (East Shroud) Harvesting – Rare Node – 10:00 pm Eorzea Time
  • Vampire Plant: Dragonhead (Coerthas) Logging – Rare Node – 5:00 pm Eorzea Time
  • Cinnabar (Quicksilver): Low level mining
  • Rocksalt: Low level mining
  • Basilisk Egg: Drops from Basilisk-type monsters
  • Spoken Blood: Drops from Djigga-type monsters

Sources:

‘Magnesium02’ from Lodestone: http://forum.square-enix.com/ffxiv/threads/71222-A-Relic-Reborn-Walkthrough
Bluegatr Thread: http://www.bluegartr.com/threads/117775-Relic-Reborn-information
Reddit Thread: http://www.reddit.com/r/ffxiv/comments/1lb8jo/how_to_get_relic_weapons

**This page is still useful – but we have a more modern Consolidated Relic Guide,
which details ALL steps in your relic.**

Follow us on Facebook for more FFXIV updates!

FFXIV ARR Aurum Vale


Soon after its discovery, miners from across the realm flocked to the Aurum Vale, driven by rumors that deep within lay endless veins of mythril. What they found instead was gold, but not the sort which would make them rich. Believing the substance precious aurum, miners unknowingly stumbled into deep pools of glowin venom thereafter known as goldbile. Not only did the liquid burn their skin, but the noisome fumes given off by the foul ooze cooked their lungs when inhaled, bringing on a quick, yet excruciating death. These truths, however, have done little to prevent new miners from braving the suffocating shafts, now even more driven to find what those who entered before could not.

Where is Aurum Vale: Located in Coerthas Central Highlands, South West of Camp Dragonhead, South West of First Dicasterial Observatorium of Aetherial and Astrological Phenomena (mouthful huh!) near Dzemael Darkhold actually.

Aurum Vale General Information

Aurum vale is all about poison, so you can imagine… Ochu’s and Malboro’s! Wohoo! Bad Breath time… Watch out for the Goldbile (map traps) and while fighting the bosses make they stack a poison type debuff called ‘Gold Lung‘ which you can cleanse yourself from eating the morbol fruits in the map. There are also mini-boss Malboro’s called Goldvines (there are 3 in the dungeon). Before fighting each Goldvine there will be morbol eggs that will spawn morbol’s if you do not defeat them in time.

FFXIV-ARR-Aurum-Vale-toxic-pool FFXIV-ARR-Aurum-Vale-morbol-fruit FFXIV-ARR-Aurum-Vale-goldvine


Aurum Vale Boss Strategy

Locksmith

This is a straightforward fight, everyone should be careful of the number of ‘Gold Lung‘ stacks you have on you, once they hit 2-3 stacks make sure you cleanse them off by eating a Morbol Fruit. Tanks should keep locksmith facing away from the party and also stun his AoE when possible.

  • Hundred Lashings: Targetted attack to person who has emnity
  • Gold Dust (PBAoE): This can be stunned, deals pretty big damage and poison
  • Gold Lung Blast: This is an instant AoE that Locksmith casts which hits the whole area, players then

FFXIV-ARR-Aurum-Vale-locksmith

Coincounter

Coincounter is a giant cyclops, what a cyclops is doing in this dungeon… Who knows! But I see what they are doing with the name and the theme of the dungeon, being a Cyclops does make someone a good Coincounter… LOL. One thing to note while fighting him he sometimes, even if your tank has full emnity, runs to a random party member and attack them.

  • 10 Tonze Swipe (frontal cone): This is an instant cast skill, but nothing to worry too much about just position Coinconter away from the other party members for this.
  • 100 Tonze Swipe (frontal cone): Position away from Coincounter to avoid this attack, trust me… It hurts!
  • Glower (targetted attack): Coincounter targets a random party member and shoots a laser from his eye… YUP!
  • Eye of the Beholder (massive frontal cone rage): at about 50% health and below, he will face a random party member and do this ability, if you are targetted try to position away as far as you can. This can be disrupted by stun BTW.

FFXIV-ARR-Aurum-Vale-coincounter-swipe FFXIV-ARR-Aurum-Vale-coincounter

Miser’s Mistress

The Mistress is a yup… Another Malboro/Morbol. This fight has the same mechanics as the fight with Locksmith, you stack up ‘Burr‘ counters and you must cleanse them by eating ‘Morbol Fruits‘. ‘Burr’ is a poison stack similar to the Gold Lung stat inflicted by the first boss you fight in Aurum, Locksmith

  • Vine Probe: Frontal line attack targeted at the party member who has emnity
  • Burr Burrows: Map wide AoE which damages and gives party members ‘Burr
  • Bad Breath (Frontal Cone): The infamous Malboro skill, you know the drill – stay away from this!
  • Hooked Burrs (Targetted attack): Mistress targets a random party member, hits them and inflicts a ‘Burr’ counter

Phase II (50% life and below)

  • Sow & Germinate: Miser’s Mistress spawns multiple ‘Morbol Fruit’ around him. Don’t be fooled, and just like the fight with Goldvine, defeat these fruits before they become ADDS

FFXIV-ARR-Aurum-Vale-missers-mistress

Follow us on Facebook for more FFXIV updates!