Heavensward Dungeons & Trials (Story) Quick Guides

A quick guide about all 3.0 dungeons and trials (storyline)

“If they do not know, teach them.” – Mahiko ‘Mister PUG’ San.

I don’t know what else to say about this page. Since I don’t feel storyline dungeons and trials need a full guide page each, here’s a compilation of all storyline dungeons and trials, with any notes to beat them. ***Forgive me if I use humor***, it’s to keep me sane during this hectic time.

This guide DOES NOT INCLUDE 60+ dungeons and EX primals (Stops at Aetherochemical RF)

Heavensward: Dungeons & Trials
Dusk Vigil | Sohm Al | The Aery | The Vault | The Great Gubal Library
Ravana, Thok ast Thok (Hard) | Bismarck, Limitless Blue (Hard)

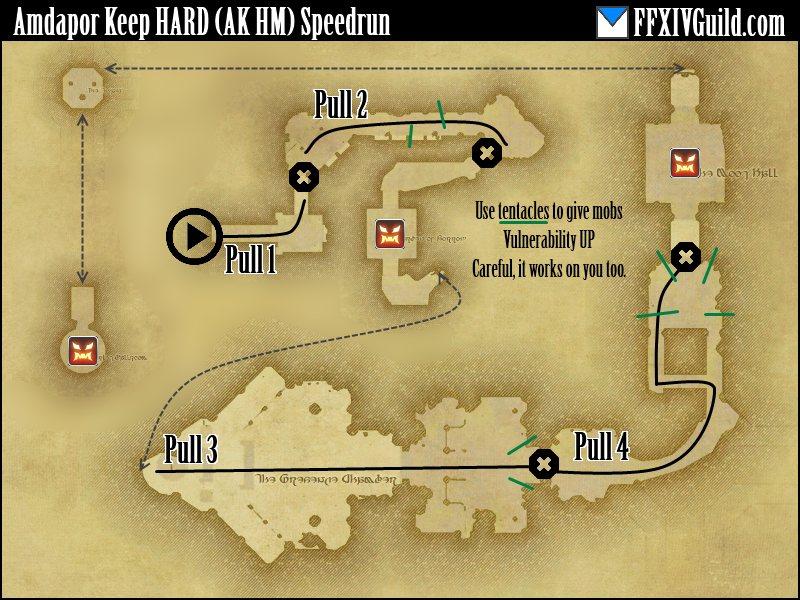
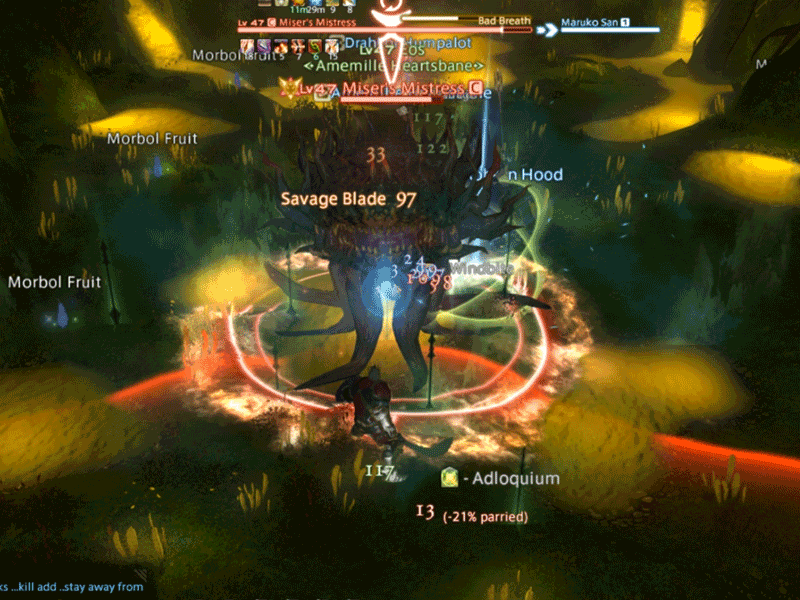
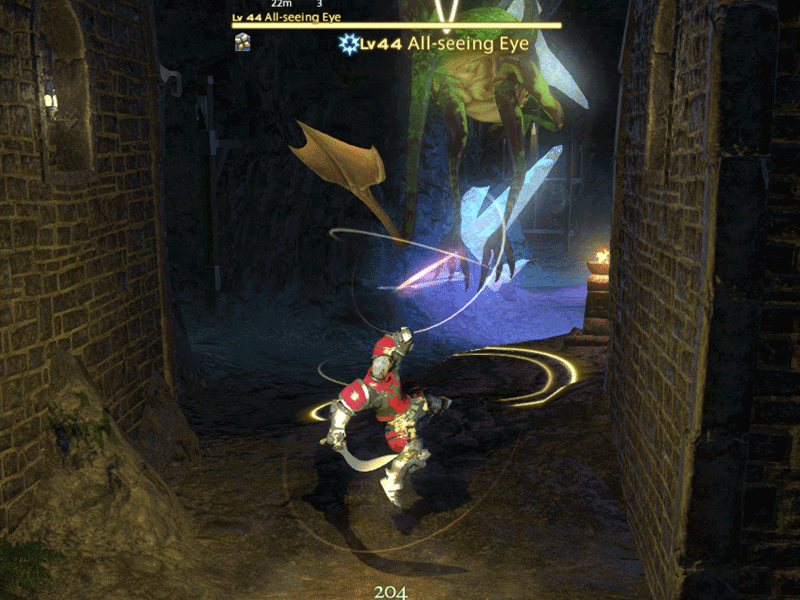
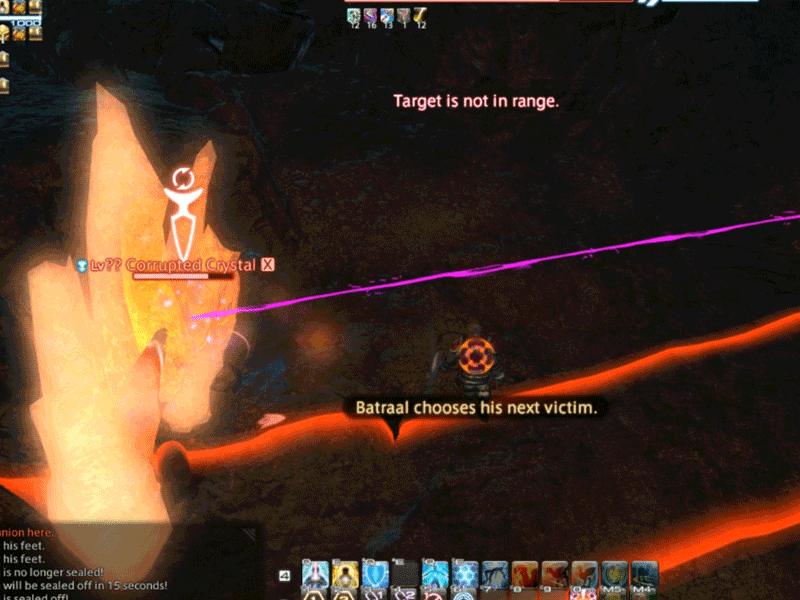
Dusk Vigil boss strategy

Dusk Vigil itself has no notable trash mob or map mechanics.

Dusk Vigil boss 1: Elephant

  • Isolate targeted guy. If its you, GTFO from your team. If its your friend, abandon him.
  • He will get wombo combo. It’s fine.


Dusk Vigil boss 2: Ghost

  • He has many ghostly friends.
  • More friends from the beyond.
  • Kill them all, again. Twice.

Dusk Vigil boss 3: Bird

  • He’s casting tornado? Hide behind rocks. You don’t stay in the open in an IRL tornado, do you?

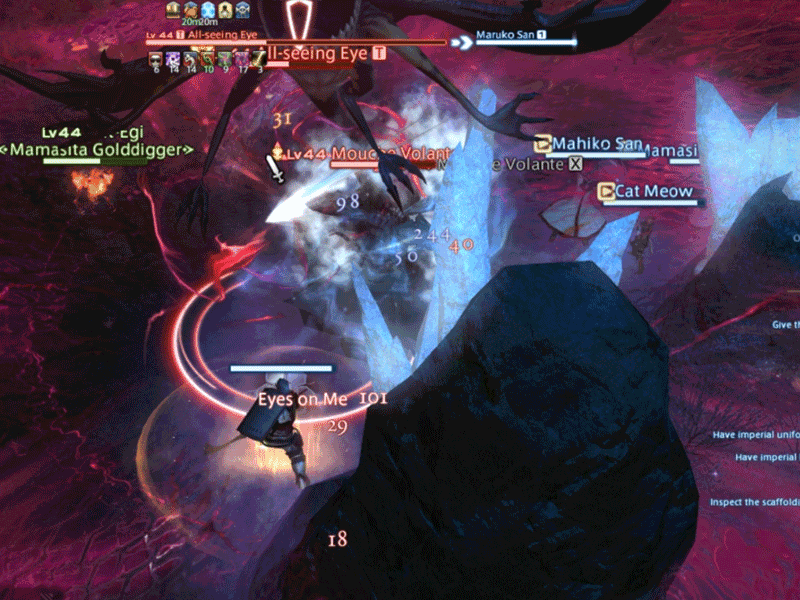
Sohm Al boss strategy

Sohm Al boss 1: Plant

  • Memories of T6… Avoid AoE after eat.
  • Hornet spawn. I assume it’s good to kill. We burned lel.

Sohm Al boss 2: Dino

  • Lookin at you? GTFO.
  • Lots of single spike damage. Keep party healthy.

Sohm Al boss 3: Dragon

  • Marker on top of you? It’s a meteor.
  • Land these on the OUTERMOST EDGE POSSIBLE.
  • Once the marker fades -> move back towards center.

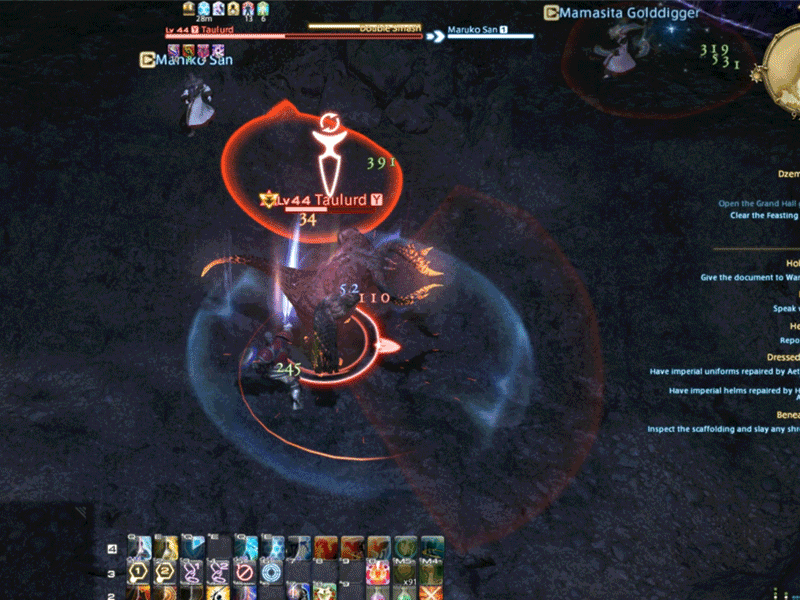
Ravana (Hard) Thok ast Thok strategy

  • Butterfly kill. Fast.
  • Avoid knockback by having an intact wall behind you.
    • That’s 99% of the fight right there.

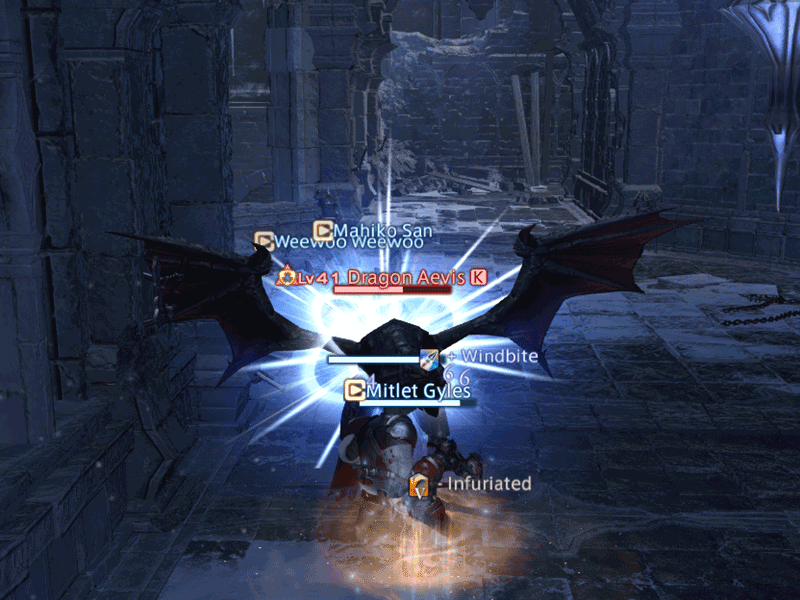
The Aery Boss Strategy

The Aery boss 1: Skinny Dragon

  • Tether to poles lel.
  • AoE 1: Safe spot is ring inside.
  • AoE 2: Melee proximity knockback.
  • AoE 3: targetted bolts.

The Aery boss 2: Medium Dragon

  • Poison clouds spawn.
  • Mustard Gas eats Clouds.
  • I cant tell you exactly what happens here. I assume killing adds is good. We burned.

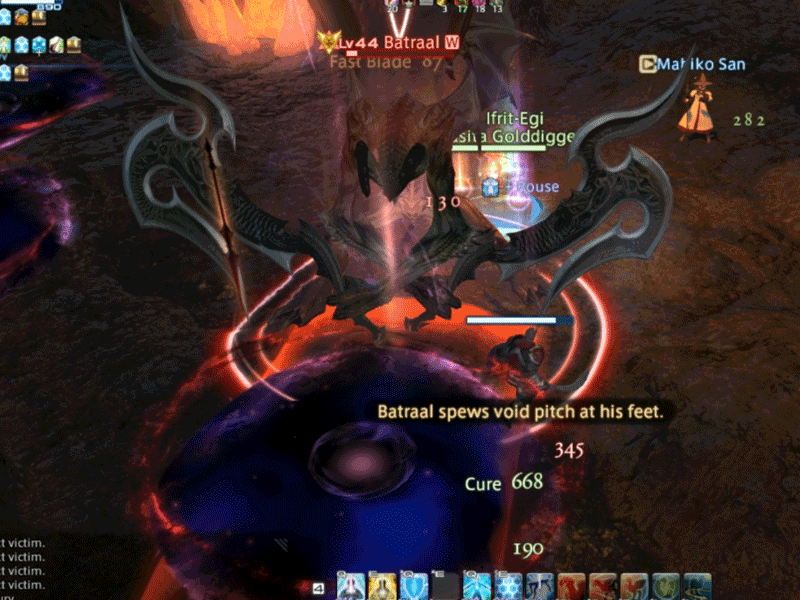
The Aery boss 3: Fat Dragon

  • Lookin at you? Move a bit. Leaves fireball.
  • Fireball rush soon after.
  • Free imprisoned friends (Don’t tunnel lel)
  • Keep DRG alive (The NPC, not your bad teammate).
  • Kill add before massacre, stand in shield.

The Vault Boss Strategy

All bosses have random AoE damage and a single spike damage skill. Just keep yer damn party healthy.

The Vault boss 1:  Sword Guy

  • Lots of fancy abilities.
  • Balls explode. lel.

The Vault boss 2: Axe guy

  • Colorful AoE. Do not stand
  • Knockback? Make sure youre NOT behind a ball.

The Vault boss 2: Robot Griest

  • Avoid marching robot (there’s spaces in between)
  • Sickness shall be purged, AoE heals.
  • Kill fireballs asap, they dont have aggro.
  • Avoid firelike “plumes”.
  • Break tethers by spreading apart from friend.

Bismarck (Hard) Limitless Blue strategy

  • Do not fall. (Tornado lel)
  • Shield in center irrelevant if your DPS has a few braincells.
  • Use harpoons -> MUST BE STANDING ON WHALE to DPS #WhalerightsPETA
  • Party takes damage while on whale, AoE heals.
  • Separate adds from each other.

The Great Gubal Library Boss Strategy

Library boss 1: Demon Wall II

  • Avoid the lane AoE.. gives slow n heavy. Demon Wall AK memory.
  • He closes! GO TO THE OTHER SIDE DAMNIT.
  • Ice floor? one press of movement makes you slide.
    • Remove little girl subligar.
    • Wear big girl subligar.
    • Deal with it.

Library boss 2: Bull

  • Fat line AoE? MOVE TOWARD HIM, FOOL!
  • Kill books.
  • Bring tether to boss.

Library boss 3: Refrigerator

  • Step on pink ‘summoning point’ to prevent adds.
    • ALL minipoints must be stood on to prevent adds in that circle.
    • comes in minipoints of 1’s, 2’s then 3’s.

Sorry for the light bordering stupid tone used in this guide. Since story dungeons are pretty damn intuitive, these will make your life a little bit easier.

Follow us on Facebook for more FFXIV updates!

FFXIV Amdapor Keep (AK HARD) Speedrun & Guide

FFXIV Amdapor Keep (AK HARD) Speedrun & Guide – notes to make your speedrun faster, and general dungeon strategy for FIRST TIMERS to AK hard!

Unlocks via Quest: Not Easy Being Green (Mor Dhona)
Item level requirement: 90
Item level of dropped gear: 100
Also drops 3-star crafting materials (Saurian Skin, Cashmere Fleece etc tier)

Navigation:
General Info (Top) || Speedrun/Map || Boss Guides

AK Hard: General enemy tips
Tentacles:
Give a VULNERABILITY UP debuff to YOU and YOUR ENEMIES – use them to your advantage!
Knotted Treant: They spawn weak adds, generally they can be ignored unless you pile them up with your SR pull.
Vulnerability Up on tank? No problem – esuna it!

Amdapor Keep (AK) Hard Speedrun

ampdapor keep hard mode akhm speedrun map ffxiv

AK HM can be completed in a minimum of THREE BIG PULLS. Five or four if you’re being safe. And the forced “gauntlet” before the final boss. Special thanks to Claes Henrietta and Rylai Ariamis for the help with notes/map!! The above map says 4 pulls, but Pull 1 and 2 can be combined by killing the Ochu and proceeding (a bit on the risky side).

Pull 1: The first pack + the ochu, Don’t blow any CD’s here, It’s a small pull. Can be combined with pull 2.

Pull 2: This is the only “debatable” pull, and is stragely difficult. there are three ways to do this:
Pull 2 MAX: Drag EVERYTHING to the treant.
Pull 2 using tentacle: Drag all non treant mobs back to the tentacle. potentially dangerous.
Pull 2 split: Drag whatever you can to the pre-treant tentacle, then the remaining chumps+tree.

The general consensus is Pull 2 MAX is the “best”, but can be a backbreaker. Pull 2 tentacle depends too much on mob movement, and Pull 2 split is best for iffy groups. You want to use all your cooldowns for this.

(boss 1)->Pull 3: A short pull, gather them up and use the tentacle to give the mobs vuln up. Kill tree after.
Pull 3 VALUE: Tag the mobs with tentacle vul up, then move to the tree.

Pull 4: This is a LONG WALK. Sprinting could be an option. As always sprint pulls are gonna be a little easier for paladins. Use the tentacle of heavenly value. ALWAYS
Pull 4 VALUE: Tag them with vuln up, then move to the tree. This can be very risky.

(boss 2), Gauntlet, then (boss3): And you’re done! Potentially the fastest SR in this tier of dungeons.

We will be recording a vid of the “minimum possible (3) pulls” for both warrior and paladin – stay tuned.

((Back to Top))


Boss 1: Anchag (“Odin”)

  • Charge is unavoidable. Walking nearer to him does significantly reduced damage. Instakills statues – careful.
  • Lasers: Targetted ally must move behind statues. Extremely strong damage otherwise.
  • Hiding behind higher health statues is preferred. (Statues may die WHILE lasering)
  • All his attacks, even his basic DAMAGES statues: Tanking in middle is safest.
  • Laser affects tank (rare, but it killed me once lol)

Not many special mechanics behind this guy. Just burn him as fast as possible. TIP: Tank reposition to new statue after each laser. No joke, lasers are fatal and you should avoid them.

((Back to Top))

Boss 2: Boogeyman

  • Boogeyman periodically goes Invisible. He cannot be damaged/targetted during this time – but you can still “see” him.
  • When you kill Luminescence(add) stand in the AoE it leaves upon death. It gives you a buff.
  • Going near the boss while buffed reveals him. (Buff signified by pulsing light)
  • “DODGE” the massive cone by facing AWAY from him ala Melusine.
  • Kill the big fat add with a long channeled skill: causes a raidwide bleed.

TIP: The dead bodies on the ground signify the adds spawnpoints. The first set is the two chumps, second set is two chumps + fat.

((Back to Top))

Boss 3 (Final): Ferdiad

  • Kill adds tethered to boss. (Stops “wild card” from expanding)
  • Slime adds bind the target. Slimed people can free themselves by helping DPS.
  • In the 2 slime 1 fat tether setup: just dps the fat tether guy.

The final boss isn’t very notable, pretty much common sense mechanics. TIP: Don’t clump up, the blades left by Black Wind can be annoying if you’re clumped up with friends.

((Back to Top))

Other dungeons released in this tier (2.5):
Amdapor Keep (Hard) || Wanderers Palace (Hard) || Keeper of the Lake

I hope our Ampdapor Keep Hard guide was useful to you! As always, careful speedrunning and be good to first timers!

Follow us on Facebook for more FFXIV updates!

FFXIV Wanderers Palace (WP HARD) Speedrun & Guide

FFXIV Wanderers Palace (HARD) Speedrun & Guide – notes to make your speedrun faster, and general dungeon strategy for first timers to WP hard!

Unlocks via Quest: Not Easy Being Green (Mor Dhona)
Item level requirement: 90
Item level of dropped gear: 100
Also drops 3-star crafting materials (Saurian Skin, Cashmere Fleece etc tier)

Navigation:
General Info (Top) || Speedrun/Map || Boss Guides

WP Hard: General enemy tips
Ignore Banners/Flags/Standards: 
Drag enemies out instead

Wanderers Palace (WP) Hard Speedrun

wanderers palace hard mode wphm speedrun map ffxiv

WP HARD is the longest dungeon in this bunch – it can be completed in a minimum of EIGHT PULLS. Although, for many groups, 9 or 10 seems to be the average! Special thanks to Claes Henrietta and Rylai Ariamis for the help with notes/map!

Pull 1: Small pull with 4 mobs, don’t waste anything here.
Pull 2: While not the beefiest of pulls, use your CD’s here since the next pull is chumpy, then boss follows
Pull 3: Small, time extending pull (boss 1 follows)

Pull 4: Can be a tricky pull due to camera angle, LOS the first pile behind the first corner, and get the rest of the chunk. Use SOME cooldowns here – it’s a bit heavy.
Pull 5: This pull is usually split, for good reason. It’s an insane pull that maxes out at 10 or 11 mobs. This, PLUS the fact the previous pull was heavy. Going all the way is NOT recommended for groups that AoE slowly. (boss 2 follows)

Pull  6: A lot of people think you have to stop at the 3 mobs.. you can actually pull allllll the way to the locked up tonberrys. It’s an easy pull of 5 mobs.
Pull 7: is a forced time waster. This is the “slime room”.
Pull 8: People usually split this but you can actually open the door and drag the pudding all the way to the end!!! This is value. (final boss follows)

((Back to Top))

Pull 5 is killer, you might need to chill out if you think your group isn’t up to snuff. We will be recording a vid of the “minimum possible pulls” for both warrior and paladin – stay tuned.


Boss 1: Frumious Koheel Ja

  • Spawns these fireball adds that CANNOT be ignored.

Overall a nondescript boss which doesn’t do anything special. To be honest, I want to type more here – but I just cant.

((Back to Top))

Boss 2: Slithy Zolool Ja

  • Randomly spawns a bunch of flags. You must get (walk into) them to survive. Each flag corresponds to an effect.
  • 3 Negative totem types exist: Heavy, Frog, Fire RES down.
  • One positive type exists: Damage dealt UP – DPS pick these up! BOSS MUST NOT ABSORB THIS.
  • Other totems MAY BE ignored (Except, frog totem cancels out your frog status)
  • Colors are random each time – just remember the DPS+, and healer get everything else!

Key reminders: DPS+ is massive value if picked up by DPS, and massive non-value if picked up by the boss. Frog totem cancelling DPS frog status will greatly reduce the encounter time.

((Back to Top))

Boss 3 (Final): Manxome Molaa Jaja

  • Does a random slash which leaves a debuff: YOU CANNOT GET HIT BY HIS PBAOE if you have this debuff.
  • Leaves flags (standard), just drag him away from the buffing AoE and continue killing.
  • SACRED IDOL must be killed. Looks like the flags, so be aware.
  • Healers: the Doom icon is similar to PS Sire: Healing to full cancels the doom.

TIPS: Don’t stay too far from the boss. he has a MASSIVE cone attack that you might not get out of. Don’t tunnel – kill Sacred Idol ASAP.

((Back to Top))

Other dungeons released in this tier (2.5):
Amdapor Keep (Hard) || Wanderers Palace (Hard) || Keeper of the Lake

Hopefully our Wanderers Palace Hard guide helped you out! Remember, careful speedrunning and accommodate first timers!

Follow us on Facebook for more FFXIV updates!

FFXIV Keeper of The Lake Guide & Speedrun

UPDATED! Keeper of the Lake dungeon strategy guide! Having trouble killing the last boss? Beat up those dragons – get in here and find out how!

Unlocks via Story Quest Requirement. (Dungeon located in Mor Dhona)
Item level requirement: 90
Item level of dropped gear: 100
Also drops 3-star crafting materials (Saurian Skin, Cashmere Fleece etc tier)

Navigation:
General Info (Top) || Speedrun/Map || Boss Guides

Keeper of the Lake: Speedrun

KOTL: General enemy tips
Pre last boss pulls: 
the random helicopter bombs can damage enemies!

keeper of the lake kotl speedrun map ffxiv

KOTL can be completed in a minimum of SIX PULLS. Seven should be the absolute max! Special thanks to Claes Henrietta and Rylai Ariamis for the help with notes/map!

Pull 1: Useless pull… 3 crabs. Don’t blow any CD’s here.
Pull 2: A bit of a beefy pull. Get all 7 mobs and don’t spare any cooldowns. (boss 1 follows)

Pull 3: Another time extending useless pull. Kill them and get the key to proceed.

Pull 4: THIS CAN (and USUALLY is) split into two. Aggro the chumps, kill the computer, aggro the robot then AoE them down. Do not kill the dudes, then robot… You can pull the whole family but this can be RISKY! This is by far the best use of LB if you do try to pull this off! (boss 2 follows)

Pull 5 and 6: The flying machine AoE’s AFFECT THE ENEMIES. Lure the AoE to the pile by having everyone loosely stack around the mobs, as it targets a random party member.

((Back to Top))


First boss: Einhander

Spawns tanks of fuel at certain intervals. His frontal cleave (and presumably other skills) destroy it and deal damage to nearby allies. Face the boss away from all times and move away from tanks if needed. Sucks all tanks and party members towards him, so move a bit away and face him outside. In a nutshell

  • Spawns fuel tanks you should be far away from. His skills damage these objects – don’t let them die.
  • Small (auxiliary) tanks do around 1-2k… large (main) tanks explode for a TON.  Tanks can set off other tanks… be careful!
  • Pulls all party members and spawned fuel tanks towards it.
  • Reposition away from the fuel tanks and face away from party as usual.
  • Tanks can be knocked around just like Brayflox HM bombs.

Having your MT make small efficient movements to prevent explosion clusterf*cks is key to reducing encounter time here. Pure tunneling, while possible, can cause some unexpected chain explosions.

((Back to Top))

Second Boss: Magitek Gunship

A big mechanical middle finger to melee classes, this guy is just annoying.

  • Spawns adds: 4 chumps, (interval) Magitek Vanguard. The vanguard is chunky.
  • When he moves randomly, he’s setting up his flame skill.
  • He moves in a random direction leaving behind an extremely painful fire DoT. Stay away from these. Especially sucky for melee.
  • If you didn’t use Magic LB earlier: consider using it on Vanguard+Boss. BETTER YET: Ignore the Magitek Vanguard and focus down the boss – he vanishes when it’s over!

((Back to Top))

Final Boss: Midgardsormr

After pulling the boss, a short time passes until first dragon (yellow) resurrrects:

  • Boss is invulnerable during this time.
  • Has a frontal cleave.
  • Wait for a smaller add to spawn – kill this ASAP and get inside the shield it spawns (Similar to Halatali HM)

Boss does a raidwide kill unless you are inside the shield. Kill yellow before the second (blue) dragon spawns:

  • Boss is invulnerable during this time.
  • Has frontal cleave.
  • Must be NEAR BOSS to be damaged.
  • Same mechanic here… small add spawns > kill it > get inside barrier.

Again, your party is dead if you fail to get into the shield. Kill the blue dragon before focusing on boss and killing it. Aside from the above, just avoid all the colorful AoE and you’ll be fine.

((Back to Top))

Other dungeons released in this tier (2.5):
Amdapor Keep (Hard) || Wanderers Palace (Hard) || Keeper of the Lake

Well, I hope you found our Keeper of the Lake guide helpful! GL to you Speedrunners and new players alike!

Follow us on Facebook for more FFXIV updates!

FFXIV Halatali Hard Mode (HM) Guide

Areana? or ZOO? Have a look at our Halatali HM Guide! Includes boss strategy and loot list!

Don’t let goblin-gundams let you down. Let our Brayflox Longstop HM guide show YOU the way!

Basics | (B1)Pyracmon | (B2)Catoblepas | (B3)Narashima & Mumuepo | Halatali HM Loot List

Basics

Halatali Hard mode is unlocked by a quest obtained from Mor Dhona.

There do not seem to be any trash mobs of particular note in this dungeon.

If you’ve completed the Blacksmith Quest line, you’ll meet Bronze Bull as an NPC here (if you remember him. He’s actually still wearing the Cobalt Shamshir you gave him!)

Boss 1 – Pyracmon

You’ll notice a Mammet Activator that’s connected to an Admirer Mammet. When he does 1000-tonze swipe, the floor turns blue (you really cant miss it). During this long channel time, activate the Mammet Activator. The connected Mammet will then release a protective field which you can stand on.

His other abilities 100 tonze swipe – is a short-range circular AoE, sometimes accompanied by a suck, and swing again,

Eye of the Beholder hits all targets far from him. Finally Piercing Glower is a line-aoe.


Boss 2 – Catoblepas

There are 4 Shadowy Orbs near the boss. Activating a Shadowy Orb makes you immune to Catoblepas’s ultimate: Demon Eye.
You can Esuna/Leeches the debuff once demon eye is done casting, since it also reduces your Accuracy.

Every so often a “Tainted Eye” spawns at it’s head. Kill it whenever it appears. It continually gives a map-wide stacking Vulnerability debuff, so you really want to get rid of this fast.

His other abilities aren’t really noteworthy – take care of Demon Eye and Tainted Eye – and you should be good!

Boss 3 – Group Fight + Narashima & Mumuepo

The final encounter(s) of Halatali HM consists of 2 parts. The “Group Fight“, and finally “Narashima & Mumuepo“.

Group Fight

Silent Moss (Conjurer) – He’s the healer so you might as well kill him first.
Langloisert (Lancer) – Has no aggro table and can be an annoyance, kill him second (or third).
U’libho (Archer) – Can be killed second or third, squisy and deals ranged damage.
Franz (Gladiator) – Since he’s the tank kill him last.

There’s not much to note about this fight. Avoid AoE and follow the order above, you’ll be fine.

Narashima & Mumuepo

These two come right after you defeat the group fight. Both of them do the usual AoE that you should avoid. They only have 1 noticeable skill that can cause trouble:

Absolute Bind “chains” two people in your party. They cannot move or act, and it cannot be dispelled. To remove these chains simply interact with the staff that randomly spawns on the ground.

Narashima has a Tailswipe that has quite a big AoE, so you might want to stay at his sides. Killing Mumuepo first is also a good idea.

Halatali HM Loot List

Like most dungeons in this tier, alot of chests drop 2.1 Crafting Materials – stuff like Coke & Peacock Ore.

Halatali also drops an i70 item set (details to follow), and i70 Darklight Accessories.

Found some loot we didn’t? Want something to add? Hit the comments below!

Follow us on Facebook for more FFXIV updates!

FFXIV Lost City of Amdapor Guide

Diablos doors messing you up, ey? With our Lost City of Amdapor Guide, you won’t get shouted at in DF! Includes boss strategy and loot list!

Whoever said capping Soldiery ain’t easy – didn’t read this Lost City of Amdapor Guide!

Basics | (B1)Decaying Gourmand | (B2)Arioch | (B3)Diablos | Lost City of Amdapor Loot List

Basics

LCOA can be unlocked with the quest that starts in Mor Dhona.

Special Trash Mobs

Mold Colony / Tainted Mold / Hecteyes – this trio can often be found before first boss.

  • Mold Colony Should die first, but Tank should hold aggro on Hecteyes in the meantime.
  • Tainted Mold can be killed with any one attack. The do AoE poison so just let ranged/healer do it.
  • Finally, any Hecteyes Remaining should be killed

Baalzephon – Spawns with a pack of “Dirty Eye” and “White Magestone”. There is often confusion about what to do here..

  • Kill Dirty Eyes first. They do some damage so pile them up and AoE them down.
  • White Magestone should be killed second, since it heals Baalzephon. (These guys do no damage)
  • Baalzephon should be killed when it’s the last thing remaining.

(Special Trash Mob – Mold Colony – spawns in the area before first boss)

Boss 1 – Decaying Gourmand

Affectionately known to us as “Advanced Gobbue”. This guy is pretty basic, but you have a few mechanics to look out for.

Prey – His main mechanic. A link will appear to a random non-tank raid member. After a few seconds the target will be eaten. Simply kill the “Voracious Maw” that spawns shortly after (Kind of like Titans Heart). The consumed party member will take heavy damage, so free them quick! After

He has various skills that give Poison. Just esuna/leeches them away.

Decaying Gourmand also leaves dangerous Pollen on the ground that you should just avoid.

Overall, a pretty easy boss, shouldn’t give you much trouble!


Boss 2 – Arioch

The boss begins quite differently: You cannot target it. There are adds (Ranch Wamoura), when killed give a debuff that “attracts” the boss to you. Which is pretty much the main mechanic of this fight. Ideally, the tank should be the only target of the debuff. Party should just move away before the Ranch Wamoura dies! If you’re not a tank, but the boss

The debuff is called Scale Flakes, and will attract the boss to you for 45 seconds. It has no aggro table, so stuff like provoke will not work. If you’re a non-tank, but attract the boss, it’s not the end of the world. His damage isn’t too big, but make sure to use some defensive abilities. Take note that while Arioch has no target, it will heal quickly.

His abilities aren’t too special or hurt too much. He leaves a growing ground AoE that should be avoided. Aside from that, nothing much.

(Special Trash Mob – Baalzephon – spawns in the area between Arioch and the next boss…)

Boss 3 – Diablos

Ahh, I foresee alot of frustration with PUGs here…

Ruinous Omen – A massive nuke that can be avoided doing the doors correctly.

Diablos Main Mechanic – Diabolical Gate (AKA Doors)
These doors appear right at the start, but wont have any significance till later. There are 4 types of doors

  • Green “Butterfly”
  • Red “Ahriman”
  • Yellow “Lion”
  • Blue “Gobbue”

Opening two of the same kind during Ruinous Omen channel makes your party avoid it!

His other abilities aren’t that noteworthy.

Graviball leaves a sphere on the ground which you should avoid.
Nightmare is a mapwide Sleep.
Ultimate Terror never really came out, we just kept stunning that one… (Will do this for science later)

All his channeled skills can be interrupted (except Ruinous Omen).

Lost City of Amdapor Loot List

Like most dungeons in this tier, alot of chests drop 2.1 Crafting Materials – stuff like Coke & Peacock Ore.

Lost City of Amdapor also drops Darklight Accessories (Neck, Ear, Wrist, Ring)(i7o) for all classes.

Found some loot we didn’t? Want something to add? Hit the comments below!

Follow us on Facebook for more FFXIV updates!

FFXIV ARR Amdapor Keep

Things to look out for

A special pet “Demon Brick” drops with a 100% chance from a treasure chest just before the room of the first boss, on the left.

Psycheflayer

The fight start out with ‘Lunatic Priest’. After he hits around half health he will summon the real boss, Psycheflayer. Make sure you kill the Lunatic Priest as fast as possible once Psycheflayer is up.

  • Tanks – Make sure you hold aggro on Psycheflayer when he spawns. He can one-shot your healer. If you let go of Lunatic Priests enmity, it’s okay.
  • Healers – Use Stoneskin on your tank to prevent getting enmity when Psycheflayer spawns. Don’t use regen before this either. Make sure to use Esuna on “Disease”, as it halves healing.
  • DPS – Kill Lunatic Priest ASAP.

Psycheflayer has two main abilities. A heavy single target nuke, and an AoE attack. He will use this abilities throughout the fight.

Phase 2

Psycheflayer will periodically animate golems. These golems have 2 main abilities, A frontal line attack which should be dodged, and a heavy AoE attack.

  • Tanks – should try to stick to golems. As long as they dont go to your healer, you’re okay.
  • Healers – AoE damage can get pretty out of hand – get ready for it.
  • DPS – Save offensive cooldowns for when golems spawn. The faster they die, the less damage your team takes.

At lower life, Psycheflayer animates a Giant Golem, which does a massive AoE attack. This can be dodged by taking cover behind pillars, or simply moving out of the way. He will die when Psycheflayer dies.


Demon Wall

Demon Wall may seem like a daunting fight, but once you (literally) get the rhythm down, he’s not that bad.

The main mechanic of this fight is the “dance” you have to do. Demon Wall will spawn a black stripe you must avoid at the center of the lane. Following that, 2 black stripes at each side. This process repeats twice, after that he does Repel. Repel will push you off (resulting in KO), if you are not in the center of the lane.

After 2 Repels, he will spawn adds. These bees have very powerful AoE attacks that should ideally be dodged or avoided.

Helpful tips:

  • Stay at the edges after each repel since the first area to avoid is always the middle.
  • DPS Limit Break of any kind should be used on the bees if you have it. (Still totally doable otherwise)
  • Tanks / DPS – Stop the bee’s AoE if you can.
  • Healers – Spam healing if you have to. It’s a very short fight.

Also, after each repel he will move closer to the ooze at the end of the lane. Eventually resulting in a wipe if he is not killed on time.

Anandaboga

This fight is very easy, but one wrong move can cause things to go in an uncontrollable spiral. Anandaboga has three moves to look out for.

  • A frontal cone attack that should be avoided at all times.
  • A rear cone attack that should be avoided at all times.
  • >He periodically summons a ball of energy in the center of the room. Take cover behind the Gargoyle statues.
  • Healers : You must dispel disease at all times.

After a set amount of time, the statues will animate to become adds, in this order: Upper Left, Lower Left, Lower Right, Upper Right. Because of this, Anandaboga should be tanked in the right side of the room. Needless to say, kill gargoyles immediately after they spawn.

After two Gargoyles, he gains a new ability. A bright pink line will appear to be connected to a random non-tank party member. Whoever is affected by this line must run as far as you can from your team. A ball will soon appear where this party member is, and continue to damage anyone in a large area of effect around it. As you can imagine, you want this as far from your party as possible.

Since these gargoyles also serve as cover from his ultimate, once the last one turns into an add Anandaboga must die quickly after. You won’t have any cover left after the fourth one!

Follow us on Facebook for more FFXIV updates!

FFXIV ARR Aurum Vale


Soon after its discovery, miners from across the realm flocked to the Aurum Vale, driven by rumors that deep within lay endless veins of mythril. What they found instead was gold, but not the sort which would make them rich. Believing the substance precious aurum, miners unknowingly stumbled into deep pools of glowin venom thereafter known as goldbile. Not only did the liquid burn their skin, but the noisome fumes given off by the foul ooze cooked their lungs when inhaled, bringing on a quick, yet excruciating death. These truths, however, have done little to prevent new miners from braving the suffocating shafts, now even more driven to find what those who entered before could not.

Where is Aurum Vale: Located in Coerthas Central Highlands, South West of Camp Dragonhead, South West of First Dicasterial Observatorium of Aetherial and Astrological Phenomena (mouthful huh!) near Dzemael Darkhold actually.

Aurum Vale General Information

Aurum vale is all about poison, so you can imagine… Ochu’s and Malboro’s! Wohoo! Bad Breath time… Watch out for the Goldbile (map traps) and while fighting the bosses make they stack a poison type debuff called ‘Gold Lung‘ which you can cleanse yourself from eating the morbol fruits in the map. There are also mini-boss Malboro’s called Goldvines (there are 3 in the dungeon). Before fighting each Goldvine there will be morbol eggs that will spawn morbol’s if you do not defeat them in time.

FFXIV-ARR-Aurum-Vale-toxic-pool FFXIV-ARR-Aurum-Vale-morbol-fruit FFXIV-ARR-Aurum-Vale-goldvine


Aurum Vale Boss Strategy

Locksmith

This is a straightforward fight, everyone should be careful of the number of ‘Gold Lung‘ stacks you have on you, once they hit 2-3 stacks make sure you cleanse them off by eating a Morbol Fruit. Tanks should keep locksmith facing away from the party and also stun his AoE when possible.

  • Hundred Lashings: Targetted attack to person who has emnity
  • Gold Dust (PBAoE): This can be stunned, deals pretty big damage and poison
  • Gold Lung Blast: This is an instant AoE that Locksmith casts which hits the whole area, players then

FFXIV-ARR-Aurum-Vale-locksmith

Coincounter

Coincounter is a giant cyclops, what a cyclops is doing in this dungeon… Who knows! But I see what they are doing with the name and the theme of the dungeon, being a Cyclops does make someone a good Coincounter… LOL. One thing to note while fighting him he sometimes, even if your tank has full emnity, runs to a random party member and attack them.

  • 10 Tonze Swipe (frontal cone): This is an instant cast skill, but nothing to worry too much about just position Coinconter away from the other party members for this.
  • 100 Tonze Swipe (frontal cone): Position away from Coincounter to avoid this attack, trust me… It hurts!
  • Glower (targetted attack): Coincounter targets a random party member and shoots a laser from his eye… YUP!
  • Eye of the Beholder (massive frontal cone rage): at about 50% health and below, he will face a random party member and do this ability, if you are targetted try to position away as far as you can. This can be disrupted by stun BTW.

FFXIV-ARR-Aurum-Vale-coincounter-swipe FFXIV-ARR-Aurum-Vale-coincounter

Miser’s Mistress

The Mistress is a yup… Another Malboro/Morbol. This fight has the same mechanics as the fight with Locksmith, you stack up ‘Burr‘ counters and you must cleanse them by eating ‘Morbol Fruits‘. ‘Burr’ is a poison stack similar to the Gold Lung stat inflicted by the first boss you fight in Aurum, Locksmith

  • Vine Probe: Frontal line attack targeted at the party member who has emnity
  • Burr Burrows: Map wide AoE which damages and gives party members ‘Burr
  • Bad Breath (Frontal Cone): The infamous Malboro skill, you know the drill – stay away from this!
  • Hooked Burrs (Targetted attack): Mistress targets a random party member, hits them and inflicts a ‘Burr’ counter

Phase II (50% life and below)

  • Sow & Germinate: Miser’s Mistress spawns multiple ‘Morbol Fruit’ around him. Don’t be fooled, and just like the fight with Goldvine, defeat these fruits before they become ADDS

FFXIV-ARR-Aurum-Vale-missers-mistress

Follow us on Facebook for more FFXIV updates!

FFXIV ARR Dzemael Darkhold


Seeking to utilize an existing labyrinth of natural caves, the Ishgardian house of Dzemael began construction on their eponymous Darkhold near the end of the Sith Astral Era, intending it to server as a refuge for those fleeing the flames of the Dravanian Horde. When the house’s digging uncovered an entrance to the void, allowing an army of voidsent into this realm, however, they immediately abandoned their plans and withdrew from the subterrane, sealing it off so that they might contain the otherwordly invaders within. Despite all this, the house is unwilling to relinquish its claim to the caves, and believes that if they can be cleared of the voidsent, they might still be able to see their original plan brought to fruition.

Where is Dzemael Darkhold: Located in Coerthas Central Highlands, South West of Camp Dragonhead, West of First Dicasterial Observatorium of Aetherial and Astrological Phenomena (mouthful huh!)

[howtoget image]

Dzemael Darkhold General Information

[map]

The Dzemael Darkhold has a special mechanic at the early part of the dungeon where you will see an ‘All-seeing Eye’ run through the halls casting an AoE. You can avoid being hit by this in two ways, either stay near glowing crystals which give you a buff called ‘Crystal Veil‘ this significantly reduces the damage of the AoE or simply avoid it by going far away from the Eye. The tricky part here is that he wanders unceasingly even while you are fighting monsters, so be careful!

FFXIV-Guild-Dzemael-Darkhold-crystal-veil

Map Traps: There is one map trap, they are Aether Traps which explode when you are near them

Magitek Terminals: There are several Magitek Terminals that you will come across, you must pass over all of them in a room in order to unlock the next part of the dungeon

FFXIV-Guild-Dzemael-Darkhold-aetheryte-trapFFXIV-Guild-Dzemael-Darkhold-magitek-terminal


Dzemael Darkhold Boss Strategy

All-seeing Eye (Reward: 3 Allagan tombstones of Philosophy)

This is a tricky fight if you do not position yourself well, and of course make sure all of your party members are within the Crystal Veil. More details below.

Special Mechanic (Crystal Veil): Stay near crystals to gain a buff called ‘Crystal Veil‘ this is the only way to damage the All-seeing eye and it will also significantly reduce the damage taken from his PBAoE – Eyes on me. Note that the the energy the crystals give will fade after some time, when this happens move to the next crystal to get the buff again.

The All-seeing Eye also summons adds throughout the fight, so positioning is key to make sure your party does not all get hit with the various AoE skills all of them will do. The first set of adds are easy to get rid of but the second set do a frontal AoE cone… So you can imagine how the tank needs to gather emnity for the All-seeing Eye and the adds to make sure their cast effects are targetted to a direction away from the party

  • Eyes on me (no cast huge PBAoE): Simply put, it deals very significant damage if you are not near any crystals under the buff ‘Crystal Veil
  • Cursed Gaze (fontal AoE cone): Gives Amnesia or Paralysis

FFXIV-Guild-Dzemael-Darkhold-all-seeing-eyeFFXIV-Guild-Dzemael-Darkhold-all-seeing-eye-fight

Taulurd (Reward: 7 Allagan tombstones of Philosophy)

We like to simply call him… Turd! lol He summons adds that stay on top of a platform, they throw rocks at you, some can be avoided and some cannot, make sure you avoid the ones that can be! (they will have ground AoE cast circles) oh, and also, dont lump up together!

  • Double Smash (frontal cone AoE): Position away from Taulurd to avoid this attack
  • Elbon Drop (frontal cone AoE): Stronger than the Double Smash, Turd starts doing this once you get past 50% life

FFXIV-Guild-Dzemael-Darkhold-taulard

Batraal

Batman ugh Batraal is a huge demon bat with two swords, he has a frontal line attack (Desolation) that can instantly KO anyone caught in the attack, so watch out for it! He will also link himself to crystals at several parts of the fight which makes him invulnerable, you will have to destroy the crystals he attuned to, in order to proceed. Watch out though, the crystals do an AoE every now and then so stay away whenever it casts the AoE.

  • Grim Fate (no cast frontal AoE): Batraal does a flurry with his swords and damages all party members in front of him, so make sure you position Batraal away from the party if you are a tank
  • He also does a Random Projectile to party members dealing about 25% of their life
  • Desolation (frontal line attack): This is the attack that WILL kill you if you do not avoid it.

Critical Life: at about 30% life Batraal gets stronger, starts casting Desolation at will and spawns some void like pools that deal AoE damage when stepped on. So position yourselves accordingly


FFXIV-Guild-Dzemael-Darkhold-batraal-voidFFXIV-Guild-Dzemael-Darkhold-batraal-aetheryte

Follow us on Facebook for more FFXIV updates!

FFXIV ARR The Stone Vigil


One of four watchtowers built along the Sea of Clouds by the city-state of Ishgard, the Stone Vigil was overrun and occupied by the Dravanian Horde not long after the Calamity. The following years have seen the knights of House Durendaire make several attempts at reclaiming the fortress, but to no avail. What could it be that thwarts their every effort?

Where is The Stone Vigil: Located in Coerthas Central Highlands, West of Camp Dragonhead, North West from Whitebrin Fort

The Stone Vigil General Information

Stone Vigil is a classic fortress map / instance where your team works their way to the end of the castle fighting enemies and bosses. Since Stone Vigil has been overrun by Dragons you will notice the barriers are made up of flames. Obviously most of the enemies inside are dragons also. There are traps in the form of random dragons popping up and breathing fire to your party and ice sprites that will pop up in some areas in the dungeon. There are also roaming enemies which you have to watch out for!

[map]

Dravanian Outflyer: These dragons swoop down in random areas of Stone Vigil as a map trap, they spit fire in front of them dealing fire damage. Make sure that you remember where they drop down so that you do not fight midst their fire breath.

FFXIV-ARR-The-Stone-Vigil-dravanian-outflyer

Dragon Aevis: Just like the Manor Maidservants in Haukke Manor, these Dragon Aevis’s are roaming enemies, make sure to tag them separately from the other enemies in the dungeon or else you’re in for a party!

FFXIV-ARR-The-Stone-Vigil-dragon-aevis

Ice Sprite: In some parts of Stone Vigil, where the area is open to the outside breeze, Ice Elementals will pop up in groups of four. They are easy to beat on their own, but make sure you dont get caught fighting them while a patrolling Dragon Aevis hops in.

FFXIV-ARR-The-Stone-Vigil-ice-sprite


The Stone Vigil Boss Strategy

Chudo-Yudo

Chudo-Yudo only has two skills, but they hit hard and they are AoE skills so make sure you stay clear from him. His main mechanic is running around the map casting Swinge, so just make sure the party positions themselves accordingly.

  • Lion’s Breath (frontal cone fire attack): Make sure your tank faces away from the party, and also note that if your tank acts fast they can avoid this attack
  • Swinge (large frontal AoE cone): Chudo-Yudo moves to a spot on the map and casts Swinge, there is no AoE marking on the ground so try to stay behind him when he casts this. This skill also inflicts status ailments (Silence and Pacification for about 3 seconds)

FFXIV-ARR-The-Stone-Vigil-chudo-yudo

Koshchei

This is a fun fight! Reason being you have to control 3 cannons in Koshchei’s lair because a dragon will pop up to help Koshchei out and this will signal your party to interact with the cannon to kill the other Dragon. Koshchei also summons whirlwinds which deal huge DoT damage if you stay inside it (they are slow and easily avoidable) but he casts multiple whirlwinds as the fight goes on so positioning is key. If you have a ranged DPS they should position themselves near the cannon to be able to interact right away. The tank should face Koshchei away from the rest of the party (We place him near the entrance of the room).

FFXIV-ARR-The-Stone-Vigil-koshchei

Isgebind – Final Boss

This guy is the second main boss dragon you will fight in the series of dungeons, he is an ice dragon and casts some nasty AoE attacks! His main mechanic is to fly into the air multiple times throughout the fight, swoops down to do an ice breath attack and then lands to continue fighting you. At about 50% life when he takes to the sky Isgebind casts targetted AoE projectiles to all of the party (make sure to avoid this) in addition to swooping down to do an ice breath. The fight is about positioning and making sure you dodge his AoE attacks.

FFXIV-ARR-The-Stone-Vigil-isgebind

Follow us on Facebook for more FFXIV updates!