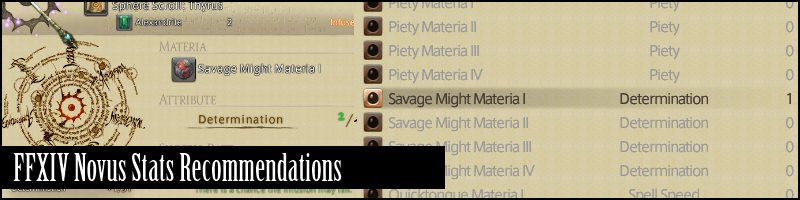
So you’re done with the hellish Animus Grind – Welcome to the grindy world of Novus! But wait – What stats should you meld on your Novus!? If that’s what you’re wondering you’ve come to the right place. Let us guide you through the different ways you can meld your Novus Relic!!! Good luck! Each weapon recommendation has My FC Mates Mainclass recommendations. and My preference.
Navigation
Tank: Curtana / Holy Shield Novus (PLD) || Bravura Novus Stats (WAR)
Healer: Thyrus Novus Stats (WHM) || Omnilex Novus Stats (SCH)
Melee: Sphairai Novus Stats (MNK) || Yoshimitsu Novus Stats (NIN)|| Gae Bolg Novus Stats (DRG)
Caster: Stardust Rod Novus Stats (BLM) || Veil of Wiyu Novus Stats (SMN)
Novus Stats FAQ
Novus to Nexus stat bonus? Huh? for each 22 of a stat, you get a small bonus when upgrading to Nexus. Each weapon can have 3 of these bonuses and we aim to capitalize on it (44 on a stat makes this bonus twice). Sadly, PLD Curtana/Holy Shield can only cap out on 2 of these bonuses.
Accuracy on DPS Novus!?!? Yes. Each DPS class (and tank class) has Accuracy on my “practical” melding recommendation. WHY? For added flexibility choosing the best gear. What happens if you dip below accuracy and are forced to use Skill Speed gear (I’m looking at you, Bard) – oooo I bet you wished you had ACC on your Novus now! Besides RELIC will almost always be filler to final boss weapons.
I MADE A MISTAKE MELDING MY NOVUS!? HELP!? Chill. You can fix that once your Novus is complete. You just need 1 Alexandrite and 1 Materia for each mismeld you did.
If you had one – what melds would you use!? MY (Subjective) preference is underlined and bolded.
I’m poor! Help! The lessen cost melds contain no IV’s AFAIK – and are sometimes even better.
Curtana (Holy Shield) Novus Stats Melding
Defensive: 31 Parry, 22 ACC
+Holy Shield: 11 Parry 11 ACC
A full defense, full flexibility meld that helps you switch gear around for maximizing other stats. Overall, a GREAT choice for any PLD.
Defensive (lessen costs): 22 Parry 22 Accuracy 9 DET
+Holy Shield: 8 Parry 8 ACC 6 DET
Sacrifice a little flexibility for some balance (and money saving) DET on your Curtana/Holy Shield is still pretty damn good.
No Parry: 22 Accuracy 22 DET 9 CRIT
+Holy Shield: 9 DET, 13 CRIT
For the above meld, freely adjust your CRIT and ACC numbers. Max out on DET if you can.
No Parry (lessen costs): 14 ACC 16 DET 23 CRIT
+Holy Shield: 8 ACC, 6 DET, 8 CRIT
This meld is a little weird… you don’t get any stat bonus but save a couple million gil :D.
A note on curtana: It’s hard to save money WHILE shooting for stat bonuses since curtana reaches the Materia IV tier much faster. It’s a bit annoying how the stats are split between the two weapons, but what can we do…
Waiting for FC input!
Mahiko San’s preference: Defensive (Lessen costs) – Since this is a tank class – removing ACC from your relic is folly. A good mix of Parry/ACC/DET is a solid build while saving money – what’s not to like!?
((Back to Top))
Bravura Novus Stats Melding
Practical: 31 DET 22 ACC 22 CRIT
Practical (lessen costs): 22 ACC 23 DET 30 CRIT
I have to say this is a bit influenced by our groups playstyle. We try to make our Warrior OT as much as possible. IN MY OPINION, WAR OT is super effective due to debuff placements, this matters more since we run with a NIN. The melds above also serves as the “No Parry” Bravura melds.
Defensive: 44 Parry 22 ACC 9 DET
Defensive (lessen costs): 31 Parry 22 ACC 22 DET
Basic full defensive meld and a more balanced (IMO Superior) build that saves money and gives a great balance of stats.
Waiting for FC input!
Mahiko San’s preference: Defensive (lessen costs) – The more I look at that spread of stats, the better it seems. Since the benefit of CRIT isn’t that huge, 22 DET and 31 Parry seem like a great spread between offense and defense! HOWEVER since my group favors WAR OT HEAVILY, I’d personally meld Practical(lessen costs) for MY team.
((Back to Top))
Thyrus Novus Stats Melding
Balanced: 31 Piety, 22 DET, 22 Spell Speed
A good balance of stats – everything your WHM needs!
Balanced (lessen costs): 24 Piety, 23 DET, 28 Spell Speed
Accuracy: 31 Accuracy, 22 Piety 22 DET (Not as good compared to Accuracy on SCH Omnilex)
Just like the Omnilex, the “best stats” for Thyrus will never be universal. Each healer prefers this or that, and depends on playstyle/group. The above are solid recommendations none the less.
Mahiko San‘s (Official FC White Mage!) Novus: (Balanced)
First of all, let’s start with the 22 DET and 22 Spell Speed: I chose this because I don’t want too much DET or too much SS. My playstyle and speed of progression, however, cannot permit me to ELIMINATE Spell Speed (clutch heals and handling mechanics favors SS, not DET). Also, having at least 22 on a Novus stat gives you a +1 stat bonus when it upgrades. So why not, right?
Alot of WHM’s really like DET and don’t like SS. If that’s the case then simply meld 31 into DET, but I personally would not recommend it. The main reason people hate on SS is that bosses are “scripted” and precasting heals + perfect play leads to not needing it. People forget that actual human beings (not robots) pilot characters, and while PROGRESSING FAST thru raids, perfect play isn’t always there since knowledge of the encounter isn’t “ingrained in memory” yet. I like SS a little more than DET, and I stick to that. But I wouldn’t want to live without either.
Rest in Piety (31): I really like Piety. The max is 33 but if you choose to max it out you miss on a stat bonus from another stat (supporting stats cannot reach 22). This seems to be a no brainer. The very minimum Piety I’d meld on a Thyrus is 22. But since it’s the stat I FAVOR MOST – I put as much of it as I can.
No Crit? Yes, no crit. I DO NOT LIKE CRIT on White Mages – plain and simple. If you like crit – by all means… But I personally cannot and would not recommend it.
Lastly, Accuracy on Thyrus? isn’t bad if your group knows how to use it. I wanted to, but ultimately would rather meld Accuracy into body pieces/accessories if needed.
Mahiko San’s preference: Balanced – Well, for the sake of continuity I had to put this section. If it isn’t obvious by now I chose the Balanced strat. 31 Piety, 22 DET and 22 SS.
((Back to Top))
Omnilex Novus Stats Melding
CRIT Heavy: SCH: 44 CRIT +(31 DET or 31 Piety)
CRIT Heavy(lessen costs): 31 CRIT 22 DET 22 Piety
The obvious crit focused builds. I prefer the lessen costs one here since you may drop too much piety depending on itemization.
Accuracy*: 31 Accuracy, 22 CRIT 22 DET
Don’t laugh. I’d meld my Omnilex this way if I had one.
Like the Thyrus – healing stats really vary from person to person. Adjust as you see fit depending on your statics needs and your own play. Adjust accordingly!
Waiting for FC input!
Mahiko San’s preference: CRIT Heavy(lessen costs) OR Accuracy – Depending on your groups need/speed, either of these two builds would work wonderfully. If you don’t DPS often, stick to the CRIT Heavy (lessen costs).
((Back to Top))
Artemis Bow Novus Stats Melding
Practical: 44 CRIT 22 ACC 9 DET
Practical (Lessen Costs): 31 CRIT 22 ACC 22 DET
Heavy crit for more Bloodletters – no explanation needed here.
Brainless DPS: 44 CRIT 31 DET
Brainless DPS (lessen costs): Doesn’t exist
Well, trying to get as much CRIT as you can is a no-brainer. DET as a supporting stat is always good for any DPS class.
Waiting for FC input!
Mahiko San’s preference: Practical – I would NEVER meld an Artemis Bow without Accuracy, but that’s just me. If you’re really poor, the “lessen costs” variant is still EXTREMELY SOLID. Again, the accuracy on Artemis Bow helps you make sure you don’t get gimped by your own gear drops (like in FCoB tier).
((Back to Top))
Sphairai Novus Stats Melding
Practical: 31 DET 22 ACC 22 CRIT
Practical (Lessen costs): 30 CRIT 23 DET 22 ACC
Brainless DPS: 31 DET 44 CRIT
Brainless DPS (Lessen costs): 23 DET 31 CRIT 22 Skill Speed
DET ACC CRIT is a common theme amongst DPS relic weapons which you’ll see alot coming up.
Tiffany Faye ‘s (Official FC Monk!) Novus: (Practical)
I recommend the 31-22-22 (DET ACC CRIT) meld because the relic is your comfort weapon. Having accuracy on your main weapon will give you the best flexibility when itemizing your character.
Although the current BiS list for monk already has sufficient accuracy even with the Crit/Det Dreadwyrm weapon, new equipment with better stats might come out on other slots (for example, a Crit/Det rings to replace the Ironworks Str Ring). The Accuracy zodiac would allow you to use the new ring without dropping below the accuracy cap.
Another reason I prefer the 31-22-22 meld because it is MUCH cheaper (potentially save millions of gil by skipping Crit IVs)
Mahiko San’s preference: Practical – 31 DET on MNK is insane if you can afford it. There’s really not much else to say with these straightforward DPS relics like Sphairai.
((Back to Top))
Yoshimitsu Novus Stats Melding
Practical: 31 DET 22 ACC 22 CRIT
Practical (Lessen costs): 31 CRIT 23 DET 22 ACC
Brainless DPS: 31 DET 44 CRIT
Brainless DPS (lessen costs): Doesn’t exist
Yoshimitsu Novus melds are part of the no-brainer relic pile.
Waiting for FC input!
Mahiko San’s preference: Practical – SS is a junk stat on NIN as well. There’s not much else to say. If you’ve got the gil – this is the meld for your Yoshimitsu.
((Back to Top))
Gae Bolg Novus Stats Melding
Practical: 31 DET 22 ACC 22 CRIT
Practical (Lessen costs): 30 CRIT 23 DET 22 ACC
Brainless DPS: 31 DET 44 CRIT
Brainless DPS (lessen costs): Doesn’t exist
Gae Bolg Novus melds are part of the no-brainer relic pile.
Eirlys Castillo ‘s (Official FC Dragoon!) Novus: (Practical)
Explanation for 31-22-22 Gae Bolg melding
(1) Reasons for maxing Det: Det is the most crucial substat for most classes. While crit is nice, an increase in det is a 100% increase in DPS, no matter how minor. Therefore maxing the Det component is something most would consider wise to do.
(2) Reasons for 22-22: The most important reason someone would want to meld 22-22 for the remaining 44 allowances is because 22 is the key number you want the substat to be at. For every 22 points into a substat, each upgrade will increase said substat by 1 point. Anything below 22 will remain that at that value through upgrades. Going 22-22 also means you don’t have to meld IV materias, which means there’s no chance of wasting copious amounts of gil.
(3) Reasons crit-acc: Crit is the next most important substat, some might argue it equally as important or even more so, but personally I think its Det>Crit for the reason stated in (1).
Accuracy is probably the most important substat for any non-healer class. Without sufficient accuracy, you risk missing which results in a massiva DPS loss, especially if it’s one of the big hits (Full thrust, Jump, etc.). While the i130 BiS list already has sufficient accuracy for T13 flanks, having spare accuracy on your weapon means more flexibility for BiS lists in the event of new equipment, especially accessories, being released (e.g. A crit-det ring)
Skill speed is definitely out of the question as it does nothing but help clip your DoTs, which means it’s actually a DPS loss.
Mahiko San’s preference: Practical – Since SS is a junk stat on Gae Bolg most of the time, this is the most feasible build. As always, if low on gil, do the lessen cost one.
((Back to Top))
Stardust Rod Novus Stats Melding
Practical: 44 Spell Speed 22 ACC 9 DET
Practical (lessen costs): 31 Spell Speed, 22 ACC, 22 DET
Brainless DPS: 44 Spell Speed 31 DET
Brainless DPS (lessen costs): 31 Spell Speed 22 DET 22 CRIT
There’s almost NO WAY you can mess up a Stardust Rod Novus melding – all stats CAN be used by BLM.
Waiting for FC input!
Mahiko San’s preference: Practical – The sheer power of Spell Speed when stacked cannot be ignored on BLM’s. 44 SS is extremely potent! The lessen costs variant is still very good for your Stardust Rod.
((Back to Top))
Veil of Wiyu Novus Stats Melding
Practical: 31 DET, 22 ACC 22 CRIT
Practical (lessen costs): 30 CRIT, 23 DET 22 ACC
As long as there’s no Spell Speed – we’re happy.
Brainless DPS: 44 CRIT 31 DET
Brainless DPS (lessen costs): Doesn’t exist.
I’ll say it once, I’ll say it again… Say no to Spell Speed on SMN. These melds look very similar to the Melee Relics, ey? Again since Summoners are severely limited by mana AND Spell Speed scales horribly on them – it should NEVER appear on your Veil of Wiyu.
Waiting for FC input!
Mahiko San’s preference: Practical – Veil of Wiyu should never had Spell Speed melded… If gil isn’t a factor this should be your relic stats. The lessen cost alternative is always there if you’re a little low on gil.
((Back to Top))
Remember, these are just recommendations and you can meld however you want or tweak these builds to your liking! Good luck farming Alex, and finishing your Novus Relic! Hurry up and get to Nexus and get depressed farming lights!
Follow us on Facebook for more FFXIV updates!