
zOriginally a holy place for the first Lalafell arrived in Eorzea, the twisting labyrinth of natural caverns which wind through this massive mesa were transformed by the Pugilists’ Guild into a series of training pits, animal pens, and holding cells to accommodate the ever-growing popularity of Ul’dah’s coliseum. After the Calamity, however, the location was abandoned – those remaining in the pens, left for dead. Not all of them, however met that fate and now the tunnels are rife with those who survived…as well as the tormented spirits of those who did not.
The setting of Halatali showcases an abandoned holding pit for Ul’dah’s coliseum. The further you get, the more challenging the encounters become! Halatali has several mini-boss fights and after defeating each an Aetherial Flow appears, which you will need to interact with to go deeper into the dungeon.
Requirements
- Party Size: Four
- Either a disciple of war or magic
- Level: 17 (sync from 19)
- Time Limit: 90mins
- Must have completed all 3 previous dungeon story quests. (Sastasha, Tam-Tara Deepcroft and Copperbell Mines)
- Acquire Halatali quest (Hallo Halatili) from Nedrick Ironheart in Vesper Bay
Where is Halatali?
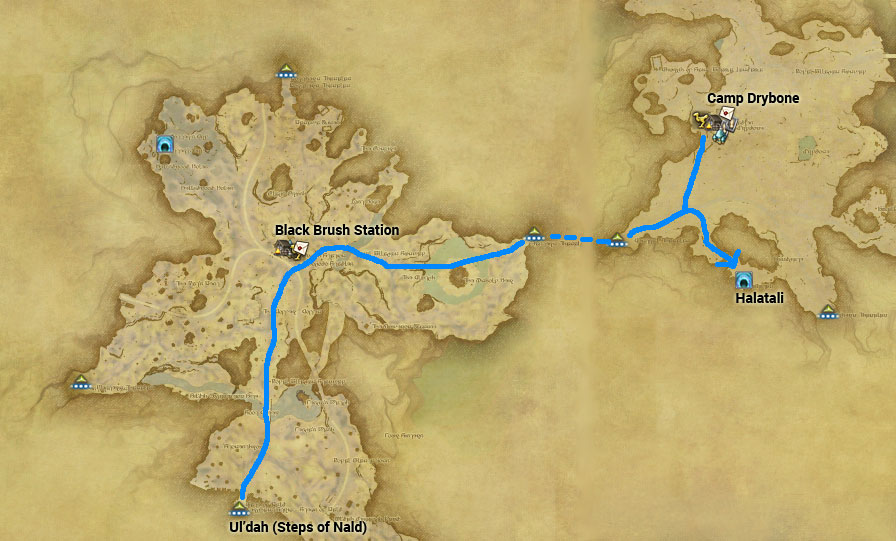
Located in Eastern Thanalan, near Camp Drybone, due west from Ul’dah (Steps of Nald).
Halatali Map/General Strategy/Tips
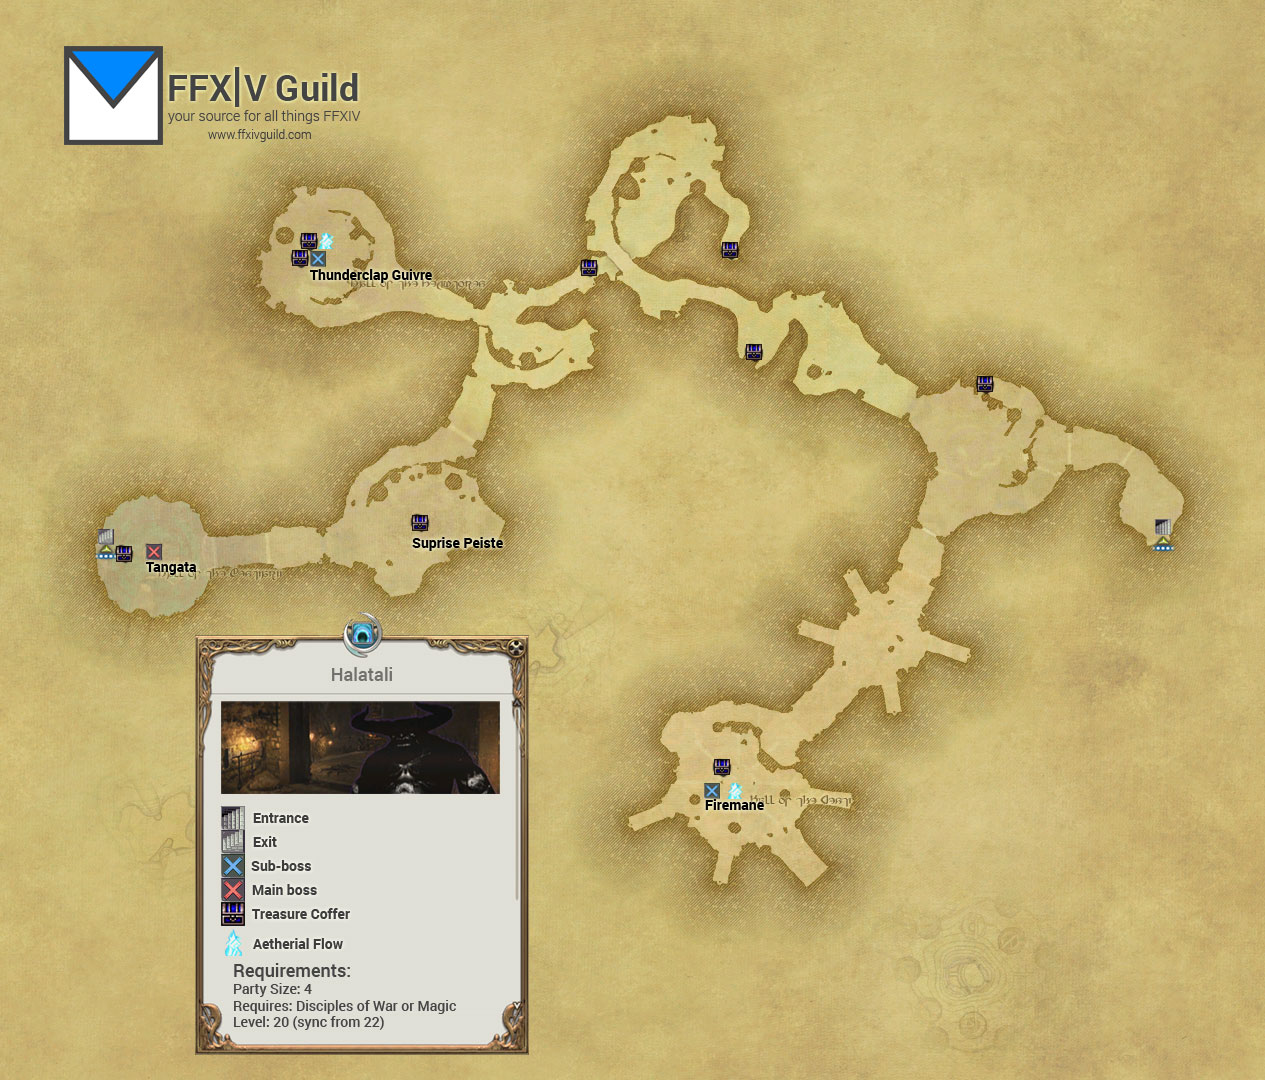 click on image to enlarge
- Random Treasure drops: Besides the points located in the map, there are some monsters that may drop treasures, from our experience this is totally random.
- Wandering Bombs: You will find random bombs popping up in the dungeon, it’s best to keep them at bay or dispose of them first before luring in other mobs. Note that, once they are engaged and left unattended, they will self-destruct, if this happens to your party make sure no one is in the red blast radius that shows up on the ground.
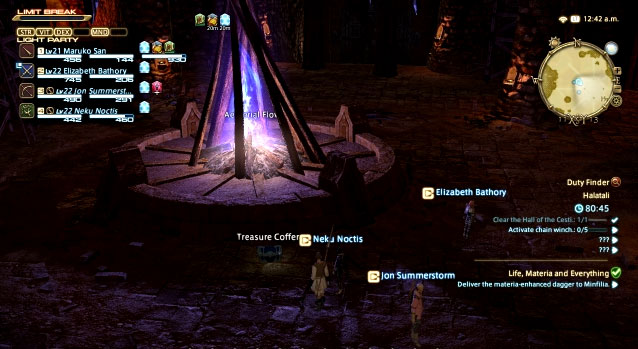
- Aetherial Flow: Two of the sub-bosses in Halatali, once defeated will spawn an Aetherial Flow, you must interact with this in order to proceed deeper into the dungeon.
Halatali Boss Strategy
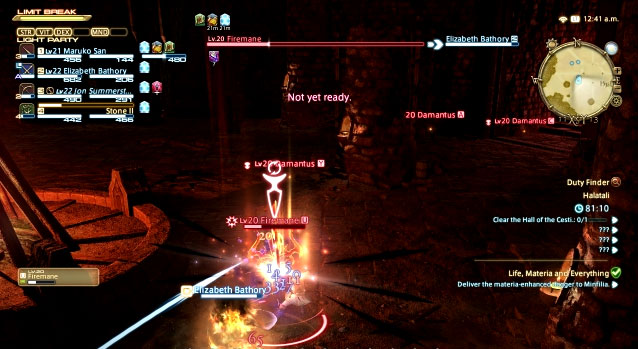
Firemane
- Firemane will dish out fire based abilities (hehe kinda obvious)
- When it reaches about 75% life, a series of Damantus (ADS) will start appearing approaching the pit in the middle of the map, once they reach the pit they explode and do AOE damage. Honestly, at how the dungeon is balanced now, there is no need to worry about the ADS because the AOE damage not significant. By the time the first AD reaches the pit Firemane would be close to 1/4 life or so.
- If your DPS can use a limit break when Firemane reaches low life, have them do so as it will charge in enough time for the next sub-boss
- Once defeated, interact with the Aetherial Flow to progress with the dungeon
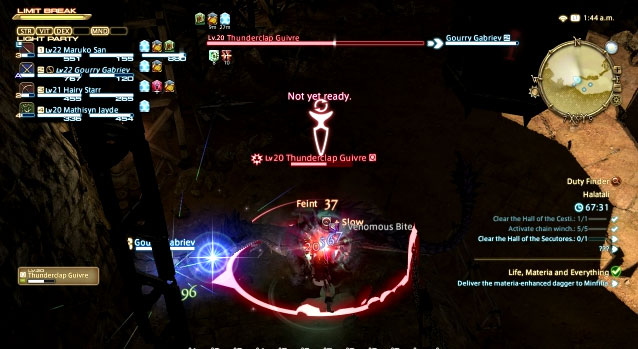
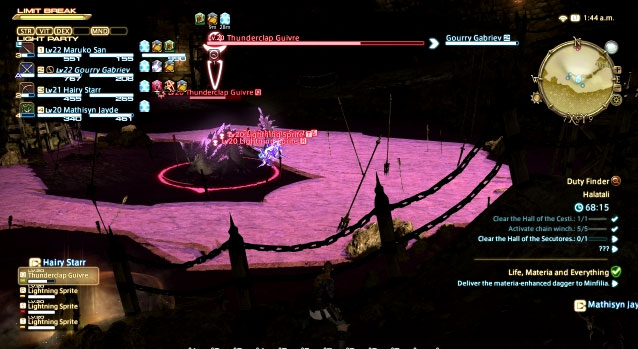
Thunderclap Guivre
- Thunderclap is an interesting fight, it is the first time a boss becomes invulnerable during a fight.
- As his name states, he is a Lightning based monster and the arena you fight him in is filled with water… We lure him to one of the ramps and engage him there because once he becomes invulnerable his form changes and Lighning surrounds him (wouldn’t wanna be near the water when this happens!)
- In his invulnerable state, he will summon 2 rounds of 4x Lightning Sprites, they are easy to defeat, at the same time though, Thunderclap throws an electric ball causing AoE damage to those caught in the radius. Be sure to watch the AoE circle and stay away from it when he casts.
- Once defeated, interact with the Aetherial Flow to progress with the dungeon
Peiste
- This is an optional sub-boss, and triggered if you decide to retrieve the treasure in the area before the you encounter Tangata. (see map above)
- There will be monsters surrounding the area, it is best to dispose of them first before engaging with the Peiste
- We’ve gotten some decent loot from this, and he is a relatively straightforward fight if the other monsters are disposed of first.
Tangata
- Tangatas mechanic has is a combination of Firemane and Thunderclap.
- At about 75% Noxius (ADS) will start spawning and make their way towards Tangata, once they reach, they will explode doing AoE damage.
- Tangata also becomes invulnerable at random, when he does, there will be lava that appears around him that does DoT damage (quite large in fact) – stay away from that! Fire Sprites will also appear, once the sprites are defeated he will no longer be invulnerable. Note: Haven’t tested this fully, but before Tangata becomes invulnerable, we have tried to stun him and sometimes it works, preventing him from becoming invulnerable. He casts a spell called ‘Double Smash‘ and if caught at the right time can prevent him from becoming invulnerable.
- Be careful, because at any point in he me be both Invulnerable and have Noxius spawning towards him.
- What works for us is to have one of your DPS engage the ADS while the rest of the party engages Tangata.


What dungeons can I do next?
Once you reach level 23, you may enter The Thousand Maws of Toto Rak.
We ran Halatali a few times to get some gear and did some leveling up (Quests, Guildhests, Levequests) before we could reach Toto Rak.