FFXIV Island Sanctuary Rare Animals Guide | List, Locations, etc

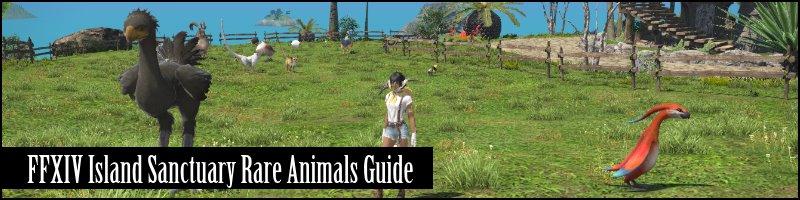
Well well well, if you’re here then you’re interested to get your foot in the door, and hopefully catch the Rare Animals in FFXIV’s Island Sanctuary! This is a pretty straightforward mini-guide that has a list of them with locations, time, weather, and other info, as well as a general FAQ about rare animals down there.

“Patience is a weapon that sanity sharpens.”
– Mahiko “Thousand Trap” San

Oh, it will be sharpened.

Updated Jan 19 ’23: Patch 6.3 Added 3 rare animals. Morbol Seedling, Griffin, and Tiger of Paradise. Added a segment discussing the comparable rarity between animals, if anyone is wonder if some animals are rarer than others.


Island Sanctuary Rare Animals List

Here’s a table that lists down all rare animals in the Island Sanctuary, along with other info like Location, Time, Weather, etc.

Animal NameRarityTierLeavings ALeavings BXYETAETDWeather
AlligatorRareLargeClawFang17246a9aShowers
Apkallu of ParadiseRareSmallEggFleece191112p3pNA
BeachcombRareSmallCarapaceClaw181312a3aRain
Black ChocoboRareMediumFeatherFur1311.5NANAClear Skies
Dodo of ParadiseRareMediumFeatherEgg16113p6pNA
GlyptodonRareMediumClawCarapace311112a3aNA
Gold BackRareLargeFeatherEgg3128NANARain
GoobueRareLargeFangClaw33169a12pClouds
Grand BuffaloRareLargeHornMilk1217NANAClouds
GriffinRareLargeFeatherClaw15223p6pClear Skies
Island BillyRareLargeHornFleece26223a6aNA
Island StagRareMediumFurHorn20206p9pNA
LemurRareSmallFurClaw20266a9aNA
Morbol SeedlingRareSmallCarapaceFang19193a6aClouds
Ornery KarakulRareSmallMilkFleece2023NANAFair Skies
PaissaRareMediumClawFleece242812p3pFair Skies
Star MarmotRareSmallFurClaw15199a12pNA
Tiger of ParadiseRareMediumFangFur15146a9aFair Skies
TwinklefleeceRareSmallFleeceFur22206p9pFog
Yellow CoblynRareSmallCarapaceFang2719NANAFog

PAISSA: Has a “unlisted” requirement that you need to have Island Rank 10 with flying mounts unlocked – its spawnpoint can’t be reached otherwise!

For some clarifications, Leavings A and B are basic and rare leavings. ETA and ETD are spawn time start and end. I just want the table headings shorter.

Anyways, I put this up here since this is probably the main point of interest of people reading this.

If you’re thinking ‘holy mother of leavings imbalance’, yeah – check this pasture setups guide.

Are All Animals Equally Rare??

No. If you want to somehow balance your pasture leavings output, and only want to flex the rarest animals?  then there is a hierarchy, I suppose…

Ultra Rare (Uncommon weather + Time)

So, the problem with these monsters is that their weather condition may not last until their time window. Since Fog is, I think, the most uncommon – Twinklefleece is undoubtedly the rares animal for now. Sometimes can go many human days without spawning.

Examples of some of the rarer animals:

WeatherRare AnimalNote
FogTwinklefleeceThe rarest of the bunch, can go many human days without spawning
FogYellow CoblynA little easier, even if fog doesn’t require time. one-ish spawns a day.
CloudsGoobueWeird alignment… can go some days without spawning.
ShowersAlligatorspawns maybe twice or thrice a human day.
RainBeachcombspawns maybe twice or thrice a human day.
CloudsMorbol SeedlingClouds like Goobue, but due to alignment, can spawn more.

Amongst these other “ultra rares”, most of them can be found maybe twice or so each human day. The rares which require common weather can be found multiple times each human day – maybe 6 or so!

Weather rarity is something like Fog > Clouds >> Rains / Showers >>> Fair / Clear Skies.

Common Weather, no time

Honestly, this category and the next aren’t too different. The only thing these guys have going for them are maybe the “rain / showers / clouds’ guys, but even then they spawn quite a lot.

For example, you can expect to find Ornery Karakul every hour or so.

With the exception of Yellow Coblyn, who even without a time, may only spawn maybe once a human day.

No weather, time only

Since you can always find these, they’re in the dumpster tier of rares. These spawn roughly every 1 hour and 1 minutes (one Eorzean day = one attempt at catching them).

Examples are Apkallu of Paradise, Lemur, Star Marmot and other bums.

Like I said, this category is IMO the absolute trash tier, but it’s only a little better than those cliffhangers in the “weather but no time” pile.

Rare Animals mini-guide and FAQ

How many rare animals are there? Twenty now. Hopefully this increases!

Do rare animals drop better loot? NO, thankfully. They have no true difference to normal ones. However, you might want some for their specific leavings combination.

What exactly makes an animal rare? Any animal that has a spawn condition would be considered “rare”.

What are these spawn conditions? Rare animal spawns can be triggered by Time and or Weather conditions.

Where do they spawn? Each rare has it’s own set spawnpoint once its conditions are met.

Are all rare animals equally rare? I suppose the short answer is NO. Many of these animals require a combination of Time AND Weather. Any animal which spawns during “fair skies” are of course much more common than animals that spawn during, lets say, showers.

Here’s a few examples:

  • Ornery Karakul only requires Fair Skies – no matter the time.
  • Star Marmot only requires Time – regardless of weather spawns at 9A to 12P.
  • Alligator requires weather is Showers, and only spawns at 6A to 9A.

Are there any other weird ways these guys are rare? Paissa has the only weird requirement – you need to be Rank 10 to reach his spawnpoint.

How long of a window do you have to catch them? Most if not all time gated rares are up for three Eorzean hours – a little less than 9 minutes.

Are they harder to catch? I don’t assume so. There’s really no way to prove otherwise, haha. Given my luck, I’d like to believe they are harder to catch because DAMN if I’ve seen them despawn a zillion times.

Summary and Outro

Welp, that’s about it! Honestly getting them all isn’t so bad. There are a few creatures that are a lot rarer than the others – but as per my quote above…. patience truly is the weapon you need. Hopefully, your sanity can last long enough to sharpen it. Negativity and memes aside, I honestly wish you the best of luck with the actual catching RNG.

If I were to suggest the most relevant reading after this:

Good luck out there!

FFXIV Island Sanctuary BEST Animal & Pasture Setups

I’m here to answer a specific question as best as I can. That is “what is the best setup / combination of animals for your pasture in the island sanctuary”. While this focuses more on a 20 slot pasture – there’s advice for 10/5 slots. If you’re here, you might want some guidance on the pasture in general, feeding your animals, and a general rank by rank overall guide to your Island Sanctuary.

To remind you, there are nine types of animal leavings:
Carapace, Claw, Egg, Fang, Feather, Fleece, Fur, Horn, Milk.

Updated Jan 18 ’23: Patch 6.3 Added 3 rare animals, which ultimately changed (erased) the “20 slot, all rare + balance” consideran “ultra rare + balance” soon. Made a quick list of the possible setups, and added some clarifications in the 10/5 slot segment.

“Do you like rare animals?”
– Mahiko ‘100 traps broken on a Dodo of Paradise’ San

Pasture Setup Rundown
– 20 Slots
Balanced Leavings Output
I want all RARE ANIMALS!
— Ultra Rares only + Balance (coming soon TM)
– 10 Slots
All leavings types, for stockpiling into the future

You’ll be at 10 slots for a while, so I highly suggest checking that one out so you can build up a diverse stockpile of leavings (Except horn).


Best 20 Animal Pasture Setup

There’s IMO only two main setups here, “all rares”, and “attempted balance of leavings”, everything else like “fueling my workshop rotation” and everything in between cannot really be categorized. .

20 Slot: “Try my best to balance leavings” setup

While this isn’t an exact science, here we try to get the most equal possible resource output. Amazingly, the “balance” can be achieved with only 19 animals – leaving the 20th as a pure bonus.

NameRarityTierBasic LeavingRare Leaving
ApkalluBasicSmall(1)FleeceEgg
AurochsBasicLarge(3)MilkHorn
CoblynBasicSmall(1)FangCarapace
Glyptodon PupBasicMedium(2)CarapaceClaw
Ground SquirrelBasicSmall(1)ClawFur
Island DoeBasicMedium(2)FurMilk
Wild DodoBasicMedium(2)EggFeather
Black ChocoboRareMedium(2)FeatherFur
Dodo of ParadiseRareMedium(2)FeatherEgg
Island BillyRareLarge(3)HornFleece
BONUS????????????

For clarity, that’s triple Coblyns, and assuming you can have 2x of a rare (Island Billy), plus a single bonus animal of your choice.

LeavingsBasicRare“Total”
Carapace223
Claw223
Egg233.5
Fang303
Feather223.5
Fleece223.5
Fur233.5
Horn223
Milk223

True, there might be a giga true balance out there, but this 19 animal, 4 easy to catch rares setup that gives this even of a spread is something most people won’t complain about – at the very least a starting point!

20 Slot: “I want all rare animals”

Once 6.3 was patched, the number of rare animals is now 20 (and may even increase in the future). So instead of having open slots like before, having all rare animals means having your pasture full of ’em too.

But if you wanna flex, not all animals are as rare as the others, so I will be placing a “ultra rare + balanced output” pasture setup in the very near future. Since you can comfortably rule out guys like Ornery Karakul for the purposes of rare collecting.

Check out the old setup

Just leaving this here for posterity… It’s no longer relevant though. Just in case the pasture expands, this info might be useful in the future.

NameRarityTierBasic LeavingsRare Leavings
AlligatorRareLarge(3)ClawFang
Apkallu of ParadiseRareSmall(1)EggFleece
BeachcombRareSmall(1)CarapaceClaw
Black ChocoboRareMedium(2)Feather?Fur
Dodo of ParadiseRareMedium(2)FeatherEgg
GlyptodonRareMedium(2)ClawCarapace
Gold BackRareLarge(3)FeatherEgg
GoobueRareLarge(3)FangClaw
Grand BuffaloRareLarge(3)HornMilk
Island BillyRareLarge(3)HornFleece
Island StagRareMedium(2)FurHorn
LemurRareSmall(1)FurClaw
Ornery KarakulRareSmall(1)MilkFleece
PaissaRareMedium(2)ClawFleece
Star MarmotRareSmall(1)FurClaw
TwinklefleeceRareSmall(1)FleeceFur
Yellow CoblynRareSmall(1)CarapaceFang
Island NannyBasicLarge(3)MilkHorn
CoblynBasicSmall(1)FangCarapace
Apkallu (OPEN)BasicSmall(1)FleeceEgg

So you’re one of those, eh? So am I. There are 17 rare animals, which gives us 3 flex slots. While I can honestly say slot 18 and 19 are set in stone in terms of balancing output – the 20th slot is a little more loose. Here it is:

Leavings Score is counting basic/rare leavings as 1/0.5 respectively.
It’s not perfect, but we have to draw the line somewhere to compare output.

As for the loosely calculater “leavings score”:

LeavingsBasicRare“Total”
Carapace223
Claw334.5
Egg143
Fang223
Feather404
Fleece244
Fur324
Horn223
Milk212.5

For the 18th and 19th animal: Island Nanny and Coblyn are very likely the most logical choices for “balancing out leavings”, as the all rare setup has a terrible amount of Milk, Horn, Fang, and Carapace.

the very last animal is a Flex – Apkallu is alright. If you can double up on rare animals, Apkallu of Paraside is a tiny bit better.

Of course, these three animals can be adjusted if you like crafting a particular thing in your workshop.

Ultimately, these suggestions can never truly be concrete. Adjust to your needs, or use as-is. I guess this serves more of a “get you started and prevent being paralyzed by choice” kinda thing.

Best 10/5 Animal Pasture Setups?

Again, since this isn’t permanent, so it’s hard to tell you what to go for. For 5 animal setups, seriously – it doesn’t matter. The amount of time you spend on a 5 slot pasture is irrelevant to any thoughts min maxing it.

As for 10 slot pasture, since you’ll be here a little longer…

If you care about rare animals, then… Just straight up gather as many as you can, while filling up the rest of your slots with fillers. Then just try to balance out the best as you can after that.

10 Animal Balanced Leavings, some rares used

Since you’ll be here a while, here’s a setup that uses a few easy to catch rares, and gives you EVERY TYPE OF LEAVING, with the exception of Horns (you can get them more easily once you get large creatures coming)

NameRarityTierBasic LeavingRare Leaving
CoblynBasicSmall(1)FangCarapace
Lost LambBasicSmall(1)FleeceMilk
Opo-OpoBasicSmall(1)ClawFur
Glyptodon PupBasicMedium(2)CarapaceClaw
Wild DodoBasicMedium(2)EggFeather
Ornery KarakulRareSmall(1)MilkFleece
Dodo of ParadiseRareMedium(2)FeatherEgg
Island StagRareMedium(2)FurHorn

This isn’t a bad setup, and it at least gives you a lot of options when crafting in the workshop. Better than just a wild jumble if you’re confused about what animal setup to use at 10. There are many setups to get a similar result – but you get the idea.

5 Animal Setups?

As mentioned earlier, you’ll be spending so little time here that this doesn’t matter. Your best bet is to look a little up there at the 10 setup, and try to get as many animals from that list as you can.

Summary and Outro

Well, I hope I helped you figure out which animals to fill up your Island Sanctuary pasture with. Again, there’s a lot of flexibility here – but if you’re confused just following the tables is a good idea. If I were to suggest the most relevant reading after this:

Good luck out there!

FFXIV Island Sanctuary | Pasture & Animal Guide

Okay, so this guide is just to cover the absolute basics of your FFXIV Island Sanctuary Pasture. Basics on catching, feeding, and (TBA) info on the best pasture setups. Welp, I suppose lets go ahead and “Gotta capture ‘em all!”. You know something along those lines was coming.

Updated Jan 18 ’23: Patch 6.3 now, thankfully gives the option to release an animal if your pasture is full and you acquire a new one. A great QoL, and all references to the old system removed, while adding this reminder as well.

Best animal setups for your pasture? That’s a more thorough guide!

While I’m certain you got the gist of it during the Island Sanctuary “tutorial” and the Island Sanctuary Codex does cover most of the basics. However, if you’re here, then that means theres something you need clarification on.

“What time is it!? What’s the weather!?”
– Mahiko “tchum” San

More advanced info on feeding and pasture setups are in a separate page, if you wan’t to learn more about those.


Island Sanctuary Pasture – the Basics

You catch animals found roaming around your island. You can keep 5/10/20 of them depending on your Pasture / Island rank. Feeding them from various choices of food can potentially improve their mood – but more importantly well fed animals drop leavings. The happier they are, they have a chance to leave another type of leaving. Ultimately, these leavings are used for more advanced workshop recipes that typically yield better prices. That’s it in a nutshell.

Now, for the usual FAQ

What, how often, and what’s the mechanics behind feeding animals? TLDR is better food is always better, and once every human day is enough. A well fed animal will always provide their primary leaving. The happier they are, the higher chances for them to leave their second leaving type. The long answer? FFXIV Island Sanctuary Animal Feed Guide. It’s pretty basic, but the few nuances deserve a small little guide on it’s own.

FFXIV Island Sanctuary Animal Mood Chart
FFXIV Island Sanctuary Animal Mood Chart – This is why you’re feeding them!

How many animals can I keep? 5/10/20 depending on your Island Rank. You’ll be at 5 (Rank ~3) for a short while, and 10 for quite a while (Rank 4) – finally unlocking 20 and caretaking at Rank 9. Since you’re gonna be at 10 slots for a while, you might want to have a balanced leavings setup for 10 slots.


How do I catch animals? You can craft consumable items that, depending on your rank, allow you to catch small / medium / large animals. It’s not a 100% chance, though – to the annoyance of many.  Your option of ‘pokeballs’ are as follows:

  • Makeshift Net (Unlocked at Rank 4~) allows Small animal capture. (needs: 1 Branch, 2 Vine)
  • Makeshift Restraint (Unlocked at Rank 6) allows Medium animal capture. (needs: 3 Hemp, 1 Copper Ore)
  • Makeshift Soporific (Unlocked at Rank 8) allows Large animal capture. (needs: 2 Laver, 1 Sap, 2 Jellyfish)

The actual mechanics of catching, is changing your action mode to Capture, and selecting the appropriate trap item for the animal you want to catch. From there, simply right-click the, hopefully, unsuspecting creature.

You then get 1 of 3 possible results. 1) You catch it successfully and it goes to your pasture (angrily, I might add). 2) You fail, and it doesn’t notice you – giving you more chances (which use up more traps. Yeahp). 3) You fail, and it DOES notice you – then it runs away. Super annoying for Weather + Time gated rare animals.


MEMEWORTHY NOTE: My friend, and I’m tempted to name him here, advised me that catching animals from directly behind prevents them from running away. I’ll test this further but this guy is known to troll me. If I find this to be a meme… I should really blame myself at this point. UPDATE: This is very likely a meme. That *****. I’ll keep this here for the memories.


What happens when my pasture is full when I catch a new one? Back in the day, you couldn’t. These days, you now get a prompt to select an animal to release if you so wish to do so. The new guy fills up the slot if you do release one of the old ones.

What are the chances for rare leavings? Pretty high. Over 50% I’d say if their happiness level is gleeful.

What’s the best animal setup? This is too broad, and honestly subjective, depending on your goals. There is no one answer to fit all, but check this out for pasture animal setup ideas.

Are there special animals? Yes. These so-called rare animals usually spawn during time windows, or during weather conditions – with some requiring time AND weather conditions to be met.

Island Sanctuary Pasture – Feeding and Setups?

As state above, these two topics deserve a little segment of their own.

What’s best and how best to feed the animals? While Feeding your animals is pretty basic, there’s some information here and there and optimizations that I don’t want to bog down this really basic guide with. For most people “Best food, once a day, caretaking” is enough of a guideline. Otherwise, if you want to learn more about feeding your animals in Island Sanctuary.

What’s the best animal setup for your pasture? TLDR – while it depends on your personal preference, the typical end-game setups are “I want all the rare animals”, “I want the most balanced yield of leavings”, “I want to fulfill my custom workshop ‘rotation’”, “I only want to feed low level food”, or a combination of these. Check out: Island Sanctuary Animal Setups.

Summary and Outro

Like I said, this is a basic of the basic rundown of the pasture. If you have any basic questions, this will probably answer most of ‘em. If you’re in need of more advanced info on the related systems of the pasture, you’ll find that on the related link on here too.

Learn more about FFXIV Island Sanctuary!

Good luck out there, and, forgive me – I only did  two Pokemon references alright…

FFXIV Island Sanctuary Farm Guide (Best Setups, Basics, FAQ)

Welcome to my little guide about the Island Sanctuary Farm in FFXIV. It’s a simple system, but hey, it’s easy to miss a few bits of knowledge here and there. Here we discuss the:

Updated Jan 17 ’23: Patch 6.3 Adds 2 more types of seeds, which will ultimately affect the “best” setup suggestions. I had to restructure completely how this data is delivered to you… Hopefully it makes sense.

Recent changelog

Updated DEC 12-22: fixed formatting and readability, little refinements and clarified some setups.

FFXIV Island Sanctuary Farm – Basics & FAQ

In a nutshell, you plant seeds, you water your plants (”once a day”), and after a few days you will get the corresponding island sanctuary produce – 5 pieces per full grown plant. Plants will not grow if dry. Rain waters all your plots automatically. Eventually, you can leave them to mammet caretakers for a daily fee.

That’s basically it! Now, for the usual questions…

How many max plots will my Island Sanctuary farm have, eventually? You get 5/10/20 plots at rank 3/4/9.

How many types of seeds / produce are there? See: Seeds, produce and locations. Used to talk about this here and in other guides, but just decided to make a small place to consolidate the info.

How often should I water plants? Once a day is fine – you can get caretakers later on at Rank 9 to do that for you. Plants only grow if they’re watered. Raining weather also waters your plots as a bonus.

How often can I harvest? Every few human days. Caretakers do this for you too – and can store a maximum of 50 produce units before stopping care.

Do plants die out? From what I hear, yes. A fully grown plant that’s not harvested will die off in a few days. This should happen very rarely if ever at all, especially with caretaking.

Best Island Sanctuary Farming Setups

There are many different phases your farm will pass – changes will be on the number of plots and number of seeds available to you. One concept we will be using forward, no matter your level (if you’re past the 10 plot stage) – is the Mahiko Special.

Best farm setups? Enter: the Mahiko Special!

The Mahiko Special aims to do 3 things:

  • Go out and gather seeds as little as possible.
  • Have as little brainpower used when choosing which produce to make feed.
  • Get as balanced an output as possible
Least amount of gatherable seeds used

Any and all seeds that are obtained via manual gathering are a bit of a hassle. Using the Mahiko Special mentality, gatherable seeds will only ever a maximum of 1 plot assigned to them.

This is simply to reduce the amount of manual inputs you have to do. That’s it. Buyable seeds are far easier to get and stockpile. It’s that simple

Plant extra of 2 types of produce

These will be the “feed producing pair”. So you will always try to grow more of two different kinds of produce, in comparison to the rest. The exact two different produce types doesn’t really matter.

Get as balanced an output as possible

Finally, plant at least one of every other seed. Simple really, you want to get a little of each possible

An Example of the Mahiko Special

This might be easier to visualize (Example R9~, 10 seed types, 20 plot):

Produce# SeedSeed TypeUse?
Popoto1Gather onlyStockpile
Parsnip1Gather onlyStockpile
Cabbage1Gather onlyStockpile
Pumpkin1Gather onlyStockpile
Isleberry2Buy onlyStockpile
Onion2Buy onlyStockpile
Tomato2Buy onlyStockpile
Corn2Buy onlyStockpile
Wheat4Buy onlyMaking Feed
Radish4Buy onlyMaking Feed

Plant 1/1/1/1 of the gatherable seeds (Parsnip, Popoto, Cabbage, Pumpkin) and DO NOT USE THEM for making feed. Of the remaining 6 buyable seed types go for something like 2/2/2/2/4/4 – then use the “4/4” produce pair to make your feed.

Gathering seeds is a pain, at least for me, and this reduces both my gathering actions, and thoughts when making feed.

Using these “Mahiko Special” rules, we can logically find a good baseline “best” setup for each 10+ plot farm setup!

20 Plot 12 Seed Farm Setup (Rank 11+)

At Rank 11+, you need to shift it up a bit. Here’s 2 variants for 20 plot, 12 seed type farms.

SeedTypeNew Rank 11Balanced
ParsnipG11
CabbageG11
PopotoG11
PumpkinG11
IsleberryV12
OnionV12
CornV12
WheatV12
PaprikaV22
LeekV22
RadishV42
TomatoV42

New rank 11 variant: In this case you plant a little extra Paprika and Leek since they’re “new”. Radish and Tomato (just an example, use any buyable seed) are your feed-making pairs. Once you have enough Paprika and Leek, I suppose you then have “2 extra free slots”. Plant any other 2 extras, or further beef up your feed-making pair. This TRIES to get as close as possible to the tenets of the Mahiko Special. It technically does.

Balanced: Having a little bias AGAINST the gatherable seed, you can have a pretty balanced output for the remaining buyable seeds. You don’t have a “feed-making pair” here, but some people don’t really care about that.


20 Plot 10 Seed Farm Setup (Rank 9 to 11)

At Rank 9 to 11, you’ll have 20 plots, and 10 seed types. Here’s 2 variants for you to start out from.

SeedTypeMahiko SpecialBalanced
ParsnipG12
CabbageG12
PopotoG12
PumpkinG12
IsleberryV22
OnionV22
CornV22
WheatV22
RadishV42
TomatoV42

The mahiko special is completely fulfilled with this setup. In this example, Radish and Tomato are used as your feed-making pair, and using only a minimum of 1 of each gatherable seed. Neat!

Balanced is, well, balanced. Straight up 2 of each produce type. Weirdly, I didn’t like this at all. It might be alright for you though!

Best 5 or 10 plot farm setups?

Best farm setup for 10 plots? Since you can gather up Island Parsnip and Popoto seeds at this point, you probably want to do a 2/2/2/3 split between the three types of plants you can grow. Sadly, you’ll be at this point for a long while until the next upgrade.

Best farm setup for 5 plots? Since you can only plant 2 types of produce during this phase, you’re forced into a 3/2 split of Pumpkin and Cabbage. You won’t have 5 slots for long so don’t sweat it.


Any nuances to these farming setups?

Well, this even split will work for a vast majority of people. I can see only two “options”, and they’re not even that big of a deal.

Note that this knowledge is pretty irrelevant to most people
if you’ve read all of the above.

The mahiko special can of course be edited for the “feed creating pair” to be any number you want. 3/3 is the minimum I’d say…

You have some special “workshop rotation” that completely ignores some produce types (or you want to fulfill the above requirement also, while doing this). In which case simply plant more of the produce you want and go to 1 or 0 on the rest. I can’t really recommend a setup for this for obvious reasons as it changes from person to person.

Island Sanctuary Farm Caretakers – how does it work?

At Rank 9 you can enlist the service of farm caretaker mammets (Just like your pasture). These guys do a couple things

  • They water and harvest the crops for you.
  • They keep up to 50 units of harvested produce for you for each plot (then they forcibly stop caretaking if you don’t offload ‘em)
  • They automatically replant the seed IF YOU HAVE IT IN STOCK.

You can only tell them which seed to plant on which plot at the start of caretaking services. SImply end and restart the caretaking if you want to change it up.

You cannot “kill” a plant that’s currently under care.

These mammets take a load of your mind, for the low cost of a few cowries everyday per plot.

Island Sanctuary Farming Basics and Setups –  Navigation:
Farming Basics & FAQ | Best Setups 5/10/20 plots | Farm Caretaking FAQ 

Summary and Outro

Well that’s about it. The farming system in your FFXIV Island Sanctuary isn’t all that complex but it wont harm anyone for me to put all I know about it here. The biggest nugget of knowledge I can share here IMO is the “Mahiko Special” up there – unbiased of course.

Check out these closely related links: Animal FeedSeeds and ProduceRank by rank Walkthrough

Learn moreabout FFXIV Island Sanctuary!

FFXIV Island Sanctuary Seeds & Produce list / locations

If you’re here, you’re probably a little curious about the different types of seeds and produce you can grow in your Island Sanctuary. There’s really nothing else to say but, uhh, “Let’s grow!”.

Updated Jan 17 ’23: Patch 6.3 Added 2 more types of seeds, Island Paprika Seeds, and Island Leek Set. Both of these are from the seed vendor, and both of them are unlocked at Rank 11.

“Get off my lawn”
– Mahiko “Mammet owner” San


Island Sanctuary Seeds and Produce List

Produce / SeedRank UnlockedNotes
Island PumpkinRank 0No tool needed, gathered in the island.
Island CabbageRank 0No tool needed, gathered in the island.
Island ParsnipRank 5needs Islekeep Shovel upgrade.
Island PopotoRank 5needs Islekeep Shovel upgrade.
Island IsleberryRank 9Purchased with Seafarer’s cowries.
Island CornRank 9Purchased with Seafarer’s cowries.
Island WheatRank 9Purchased with Seafarer’s cowries.
Island TomatoRank 9Purchased with Seafarer’s cowries.
Island RadishRank 9Purchased with Seafarer’s cowries.
Island OnionRank 9Purchased with Seafarer’s cowries.
Island PaprikaRank 11Purchased with Seafarer’s cowries.
Island LeekRank 11Purchased with Seafarer’s cowries.

That’s it – twelve types of produce and seeds. And yes, while annoying, you do get a sneak peek of these high level produce items when you have no idea how to get them.

Island Sanctuary Seed Locations

Might as well show rather than tell. Here’s an image of where to find ’em:

Seed locations notes for each:

  • Island pumpkin seeds (18.5, 26.5): 9 nodes in that area!
  • Island cabbage seeds (17.5, 20): 5 here, plus loose nodes N/W of there.
  • Island parsnip seeds (13, 15): many around this cliff. Sparse elsewhere.
  • Island popoto seeds (13, 12): more than you’ll need around this cape.

the other 8 are only buyable at the mammet NPC

Produce and Seeds – some notes

4 of these seeds are ONLY GATHERABLE – and this could be a good or bad thing. These are a little worse for me because they require actual human input to keep farming them – you actually have to go out in the world and pick them up!

8 of these seeds are ONLY BUYABLE – and this could be a good or bad thing yet again. This requires human input in the form of workshop shenanigans and or other ways to sustain buying the seeds. However, for such a cheap price a small stockpile will last you a LONG TIME.

What’s the best farm setup? I used to talk about it here, but I suppose you can now read this: farm plot setups guide.

Unlocking notes – seeds are pretty much unlocked in batches.

  • Lower ranks – Pumpkin and Cabbage are gatherable with your hands!
  • Rank 5: Islekeep Shovel upgrade for Parsnip and Popoto seed gathering.
  • Rank 9: seed vendor: Isleberry, wheat, tomato, corn, onion, radish seeds.
  • Rank 11: Seed vendor adds: Leek, paprika seeds.

Summary and Outro

That’s about it, a short and simple guide about the different types of produce and seeds for your Island Sanctuary in FFXIV. There’s really not much to say, but this should answer all of your questions. Best of luck farming it up out there.

You might want to check out these link for closely related topics – Farm setups and basics, hmm.. Animal Feeding, and I guess good ‘ol Island Sanctuary Rank by Rank guide / ‘walkthrough’.

All FFXIV Island Sanctuary related guides!

FFXIV Island Sanctuary Guide (Up to RANK 12) / Walkthrough

Aloha, Islanders! Here’s a guide on what to do every rank in your Island Sanctuary. Here, you’ll see what each rank unlocks and a little advice on what to do every rank in your island in FFXIV. Watcha waiting for? Let’s get our feet wet!

Updated Jan 17 ’23: Patch 6.3 Added Ranks 10 to 12. Rank 10 has retroactively more unlocks than before, so I noted those down in that segment so make sure to check it out. Guide updated up to R12!

FFXIV Island Sanctuary Walkthrough / Guide – Navigation
Island Rank –  1/2/3 | 4 | 5 | 6 | 7 | 8 | 9 |10 | 11 | 12

Island Sanctuary Rank 1, 2, 3 – “Tutorial”

If your Island Rank is in this range, just keep following your island “MSQ”. These early levels are FFXIV’s way to onboard you to your own Island Sanctuary. Just keep going, while taking note of what they’re teaching you.

You’ll get an intro to farming, the pasture, and workshops. Getting past this tutorial can be done within a few minutes so don’t sweat it.

Island Sanctuary Rank 4

Let’s start with what you should have DURING your stay in Island Rank 4

  • 2 Workshops (the only thing you can build on the plots)
  • Level 2 Cabin (Just visual upgrades, do it anyway since I don’t know if it correlates with other upgrades)
  • Level 2 Pasture (Up to 10 animals)
  • Level 2 Farm (Up to 10 plots) (See: FFXIV Island Sanctuary Farm Guide)

Island Rank 4 – What to do?

For this rank 4, it’s a little jarring as you’re just plopped down after the tutorial into all this. Your important goals are listed above, if you have all of those built, then it’s time to level up to R5.

The best way to gain Island EXP is through the workshop. Grinding materials is also OK if you’re that type – you’re gonna need quite a bit of ‘em anyway. Farm and pasture give a little, but it’s not relevant or very repeatable. Completing island upgrades gives some EXP too.

As you gather the materials for these upgrades, you should get pretty close to leveling up to R5 anyway.

If your island rank increases but seemingly nothing changes, wait for the next hour and / or zone in and out of your Island Sanctuary. This “bug” happened to me once and it might be a thing to look out for.

Island Sanctuary Rank 5

Island Rank 5 Unlocks:

  • Islekeep Shovel – gives additional new resources from soil nodes. Island Parsnip Seeds, Island Popoto Set, Island Tinsand, and Island Clay.
  • Granary unlocked – allows you to build Granaries
  • Basic Mammet Sized Building Tools – Craft to unlock your first Landmark plot.
  • Better Mammet Sized Building Tools – Craft to unlock Landmark plot, and 2 more basic plots.

Island Rank 5 – What to do?

Crafting the Shovel should be your first goal, as it allows you to gather the materials needed for further upgrades.

You can now build Granaries! Granaries are for Island Expeditions, which give you a pile of resources per day depending on where you choose to explore. I didn’t try to build a 3 Workshop 1 Granary split – which would be preferable as it gives you more EXP. I did a 2/2 split, but if you can do 3 Workshops do that.

Landmarks, of which you’re gonna get two plots for, are just small generic boosts to your island overall. Just make ‘em, as you can’t use the plots for other things anyway.

FOR THE FUTURE: as soon as your Granaries are up, you can start gathering for higher tier upgrades later on. This isn’t so important, but at least I can tell you now. You’re gonna need 9 Island Spruce log, and 9 Raw Island Garnet for these future tier III upgrades. You can get these from Wild Woods and Fatal Falls expeditions respectively.

Island Sanctuary Rank 6

Island Rank 6 Unlocks:

  • Islekeeps Copper Scythe – gives additional new resources from plant nodes. Island Hemp, Island Sugarcane, Island Cottonboll
  • Makeshift Restraint is now craftable, which allows you to catch medium sized monsters.

Workshop and Granary Tier II upgrades.

Island Rank 6 – What to do?

Crafting the Scythe should be your first goal, as it allows you to gather the materials needed for further upgrades.

Makeshift Restraint gives you more options for your pasture (Middle sized, tier II animals). Notably Carapace from Glyptodon Pup, Feather from Black Chocobo (an easy to get rare animal), and Eggs from Wild Dodo being the resources you’re gonna more easily gain with these medium animals.

The Tier II upgrades for Workshop and Granary are welcome upgrades, which increases overall yield.

Island Sanctuary Rank 7

Island Rank 7 Unlocks:

  • Islekeep’s Bronze Gig – gives additional new resources from the ocean nodes. Island Squid, Islefish, and Island Jellyfish
  • Best Mammet-sized Builder’s Tools. Craft to unlock Landmark III and Facility V.
  • Cabin tier III upgrade – seemingly only aesthetic.

Island Rank 7 – What to do?

Crafting the Gig is, again, the best first course of action. New resources!

Crafting the mammet-sized tools unlocks your third Landmark plot and fifth facility plot. Note that you are “forced” to build a 3 Workshop 2 Granary split – It’s a limitation set by the game.

The cabin upgrade, I mean, just do it. It’s your lowest priority IMO but you shouldn’t skip it as I don’t know if it correlates to future upgrades. Save this for last.

A rather boring tier, but the Gig does allow you to make a whole lot more stuff for your Workshops.

Island Sanctuary Rank 8

Island Rank 8 Unlocks:

  • Islekeeps Bronze Beakaxe – gives additional new resources from mineral nodes. Island Leucogranite, Island Iron Ore, Island Quartz.
  • Makeshift Soporific gives you more options for your pasture (Large sized, tier III animals)
  • Workshop and Granary Tier III upgrades.

Island Rank 8 – What to do?

Start off by making the Beakaxe – no surprise here. New resources, new recipes yada yada.

Workshop and Granary tier III should be your next goal. Improving the yield and efficiency of these buildings is never bad, right. You’ll be using alot of the new minerals.

Makeshift Soporific gets you large animals for you pasture. Most notable additions would be any of the animals that give Horn. Sadly, Horn is only a primary resource on rare animals like Grand Buffalo, and Island Billy. It is a secondary material on the basic catch Aurochs.

Island Sanctuary Rank 9

Island Rank 9 Unlocks:

  • Tier III Pasture and Farm – which allows for caretaking services.
  • Indirectly, new purchasable seeds from the NPC seeds for Isleberry, Island Onion, Island Tomato, Island Wheat, Island Corn, and Island Radish.

What to do?

First of all, upgrade your farm and pasture to tier III. Doing so allows for “automatic” caretaking. Here’s how it works for each. For both the farm and pasture, the maximum capacity will be increased to 20.

Tier III Pasture – For a small fee, each animal will be fed the “BEST AVAILABLE FOOD THEY CAN MAXIMIZE”, and their leavings will be gathered up to a max of 20 banked leavings. As for what food they’re gonna use, its a priority system that goes like this. “Food that can possibly raise or maintain their mood” > “Any lower food” > “Basic feed”. So they’re never gonna feed the tier III food to a miserable animal, and will only feed tier I or II food to a happy animal if there’s no choice.

Tier III Farm – For a small fee, the mammets will water, gather (up to 20??? as well, I’ll recheck), and replant your crops. Since you have 20 plots, and 10 kinds of seeds – it’s a basic split of 2 each.

Island Sanctuary Rank 10

Island Rank 10 Unlocks:

  • Flying Mount access on your Island Sanctuary. Allowing you to gather some new things (IE Multicolor Islebloom), and access some (Paissa) rare animal spawnpoints.
  • Islekeeps Iron Hatchet – gives additional new resources from trees. Island Wood Opal, Island Coconut, and Island Resin.

Island Rank 10 – What to do?

Flying lets you gather something new – Multicolored Islebloom. Their only purpose is for the workshop, for now. Gather some up just so you have the option to use these recipes.

Same goes for the Islekeeps Iron Hatchet – all of these materials only serve to unlock new recipes for the workshop (for now). Craft this as soon as you can.

There’s nothing else major going on, so continue the grind via workshop. Getting a good stockpile of these new materials going isn’t a bad idea either.

You also get to complete your first major vision at R10 – check the blurb below if you can’t see the quest marker yet.

Now is a good time to re-check all your buildings to make sure you’ve seen the “built or upgraded” cutscene. If you’re Rank 10, and have a fully upgraded “baseline” island with all buildings and landmarks, you’ll get a quest (The Land, Wind, and Sea) that rewards you with the Farmhands cosmetic armor set.
You NEED to view these cutscenes to unlock these quests!


Patch 6.3 Island Sanctuary Quick Notes

If you’re reading this as you’ve maxed out your island, there are some “retroactive” changes to Rank 10. Be sure to re-check the above Rank 10 notes before proceeding.

Aside from that adds a a BASIC rundown of 6.3 Island Sanctuary changes: 2 produce items, 4 gatherable materials, 3 rare animals, 2 new landmarks (plus a new permit system to unlock new landmarks), and a quest with cosmetic rewards for R12 completion. As well as a few knick-knacks in the island shop.

Island Sanctuary Rank 11

Island Rank 11 Unlocks:

  • 2 New seeds for produce.
  • Island Paprika Seeds, producing Island Paprika.
  • Island Leek Set, producing Island Leek.
  • Both of these seeds are from the seed vendor.

Island Rank 11 – What to do?

A whole lot of nothing. The only relevant evolution here is adjusting your farm setup to include the new produce items, Paprika and Leek. Since this is the first time you unlock them, you might want to add 1 or 2 extra spaces to grow them so you can get a little bit of a stockpile going.

You might want to re-evaluate your farm setup going forward as we will likely be stuck with this 12 plant 20 plot configuration for quite some time.

Island Sanctuary Rank 12

Island Rank 12 Unlocks:

  • New landmarks – Gamboling Garden, Water Otter Fountain
  • The permit system. More on this below.

Island Rank 12 – What to do?

Permit system unlocked – the permit system essentially lets you trade specific items in the real world for items (permits) used in your island. For now, this is only used for and unlocks another landmark, the Water Otter Fountain.

Another quest, Far Eastern Yarn, for the Isle Sheperd’s cosmetic item set. All you need is Rank 12, and, in case you missed it in R10, making sure you’ve finalized each building by viewing the construction and upgrade cutscenes when clicking on the signboards.

Well, for now, this is how you “win” your island. Here’s where you can start doing what you want, and chasing all the bells and whistles that you’d want out of your Island Sanctuary like…

  • Achievements
  • Optimizing pasture, or capturing all rare animals
  • Obtaining all special items from the shop

Try and find a good weekly setup for yourself so you can get a steady stream of resources without much management – if that’s your thing. Your main reward for this is DoL and DoH materia.

FFXIV Island Sanctuary Walkthrough / Guide – Navigation
Island Rank –  1/2/3 | 4 | 5 | 6 | 7 | 8 | 9 |10 | 11 | 12

Summary & Outro

(Things i’d like to add or refine: more specific ‘self-imposed’ end-game goals, I suppose? hmm fix the formatting and linking a bit)

Well that’s about it for this little walkthrough guide for your Island Sanctuary in FFXIV. It’s a pretty cool side system that I wish they continue to expand on or tie in with other systems. You get some decent rewards that you can ONLY get here – but honestly the gameplay shift is enough of an attraction for most players to try this out. It’s not difficult to “max out” your island anyway.

Just don’t expect to get “rich” in the outside non-island world here. Your island economy isn’t gonna make you a gillionaire.

All in all it’s a nice “retreat” from the real game that everyone should try! Good luck out there!

FFXIV Island Sanctuary | Animal Feed – what best to use?

Okay here’s a little micro-guide to answer a very specific question(s) regarding – What’s the best animal feed to use? This pertains to, of course, your Island Sanctuary on FFXIV. There’s also a rundown and a basic guide / FAQ on animal feeding way down there.

TLDR: To get animals TO and KEEP them GleefulPremium Greenfeed is the way to go. The other feed types only serves as “saving on produce” which is irrelevant later on.

TLDR II: There’s no downside to using a “stronger food” (wasting an irrelevantly tiny amount of resources… sure), but there is definitely a downside to using a “weaker food” when your animal is very happy.

Obviously this is heavily related to Island Sanctuary Farming.

Island Sanctuary | Pasture – What’s the best feed to use?

Each type of food can only raise animal happiness by both a certain amount, and up to a certain level. Note that all food equally fills up your pasture animals for the purposes of satiating their daily hunger. They aren’t picky eaters, apparently.

Also, animals which are very happy can “downgrade” their happiness if you feed them something subpar.

Feeding animals in your sanctuary only increases mood by “a little” each time, the RATE they gain happiness can’t be increased by using better food.

Here’s a more straightforward explanation for each:

Island Sweetfeed (Tier I, or basic food) – Improves mood up to CONTENT, and can maintain mood up to content only. If you feed an animal that has mood higher than content with this, it will LOWER their happiness up to content max.

Island Greenfeed (Tier II, or middle food) – Improves mood up to CHIPPER, and can maintain mood up to chipper only. If you feed an animal that has mood higher than chipper with this, it will LOWER their happiness up to chipper max.

Premium Island Greenfeed (Tier III, or best food) – Improves mood up to GLEEFUL, maintains gleeful mood if you keep feeding this.

FFXIV Island Sanctuary Animal Mood Chart
FFXIV Island Sanctuary Animal Mood Chart – This is why you’re feeding them!

FOR ALL FEED TYPES: You cannot “jump past” being miserable to gleeful by feeding them a single Tier III food. Animals mood improve over time by feeding continuously, so only use the most suitable food type each time – OR, of course, use a food that’s “better than necessary”. Yeah, some happiness is “wasted” but who cares.

If you don’t want to think (that’s me), feeding them all Tier III food all day erryday isn’t a bad idea – you’ll have more than enough produce in time.

Otherwise if you want to be super efficient about it, only feed Sweetfeed to animals lower than content. Greenfeed to animals lower than chipper, and finally Premium Greenfeed to get to and MAINTAIN Gleeful.

Animal Caretakers – what feed do they use?

Sadly, they seem to only ever use the specified feed. Which isn’t that big of a deal. So yeah, for the most part, you’re gonna wanna stock a ton of Premium Island Greenfeed if your goal is to reach and keep your animals Gleeful.

You select what feed they use per animal at the moment you leave them in your care, and they seem to tunnel on that. If you want to change it simply

For some reason I used to think they would downgrade feed type if the animals somehow got to a lower mood (or for new animals), I’ll have to look into it again – I don’t know why I ever got this notion.

Island Sanctuary Feed – FAQ and Basics

How do I make animal feed? Craft it from your Island actions… Here’s the recipes

Food TypeMood to and MaintainQty MadeRecipe Needs
Island SweetfeedContent33 Island Apple
Island GreenfeedChipper32 of any Island Produce
Premium Island GreenfeedGleeful32 of any PAIR (4 total) of any Island Produce

How often do I feed animals? Once a human day is just fine. (There are niche cases where you can multi-feed to improve mood faster, but that’s the only reason you’d do it)

How much should I feed animals? Once you feed them once a day, they will provide leavings depending on their mood.

How does mood affect animal leavings? The better their mood, the higher chance for them to leave their “bonus” type of leaving. Even the most miserable animals will still leave their “normal” drop as long as they’re fed.

My animals are unhappy! How can I get them happier faster? Well, you really can’t. They become more and more happy the better food and the longer you feed them (to put it really simply).

How many animals can I have? Out of topic for this guide, but you’ll get 5/10/20 of ‘em in due time.

Produce is hard! Don’t worry, in time once you get, again 5/10/20 plots – you’ll be swimming in Island Produce.

Summary and Outro

Well, that’s about it! It’s a little longer than I intended but yeah, TLDR, Premium Island Greenfeed is THE FEED for animals in your Island Sanctuary (presuming you want them to reach and keep their Gleeful status). Anything else is simply for “saving resources” during the moody early phase – or if you ever forget to feed ’em. But Premium Island Greenfeed will get the job done anyway if you don’t mind wasting a little more produce.

Remember, check the Island “wiki” in-game if you’re confused. It’s pretty legit!

Welp, that’s it! If you’re here you might want to check out other things I have to say about FFXIV Island Sanctuary.